


Download PDF guide
Office 365 - OneDrive Pre-Requisites
To enable the Office 365 OneDrive integration with FrogLearn some initial steps will need to be configured within the school’s Office 365 tenancy. This will include the generation of a client secret.
Should your school wish to have single sign on between Office 365 OneDrive and the Frog platform then you may wish to consider one of the integrations below:
- Active Directory Federated Services (ADFS)
- Azure
Both integrations will be the responsibility of the school to configure, however, if you would like any guidance then please contact the Service Desk on 01422 395 939 or support@frogeducation.com.
How-to
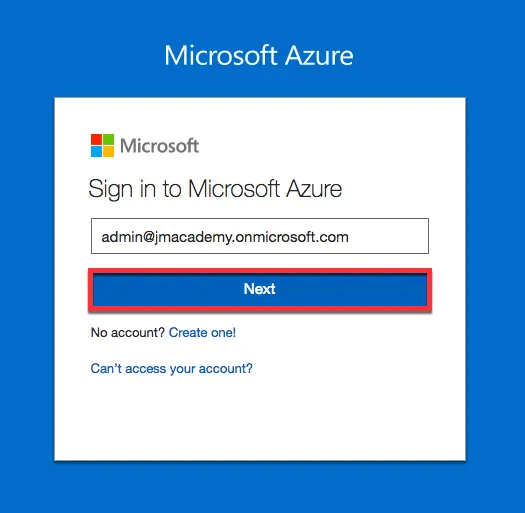
To configure the OneDrive integration, navigate to your Office 365 Azure instance via the URL https://portal.azure.com. Enter your school’s Office 365 administrator account for the tenancy and then select the Next button.
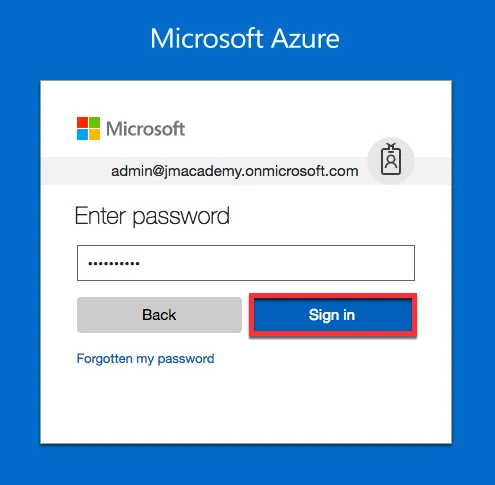
Enter the associated password for your school’s Office 365 administrator account for the tenancy. Then select the Sign In button.
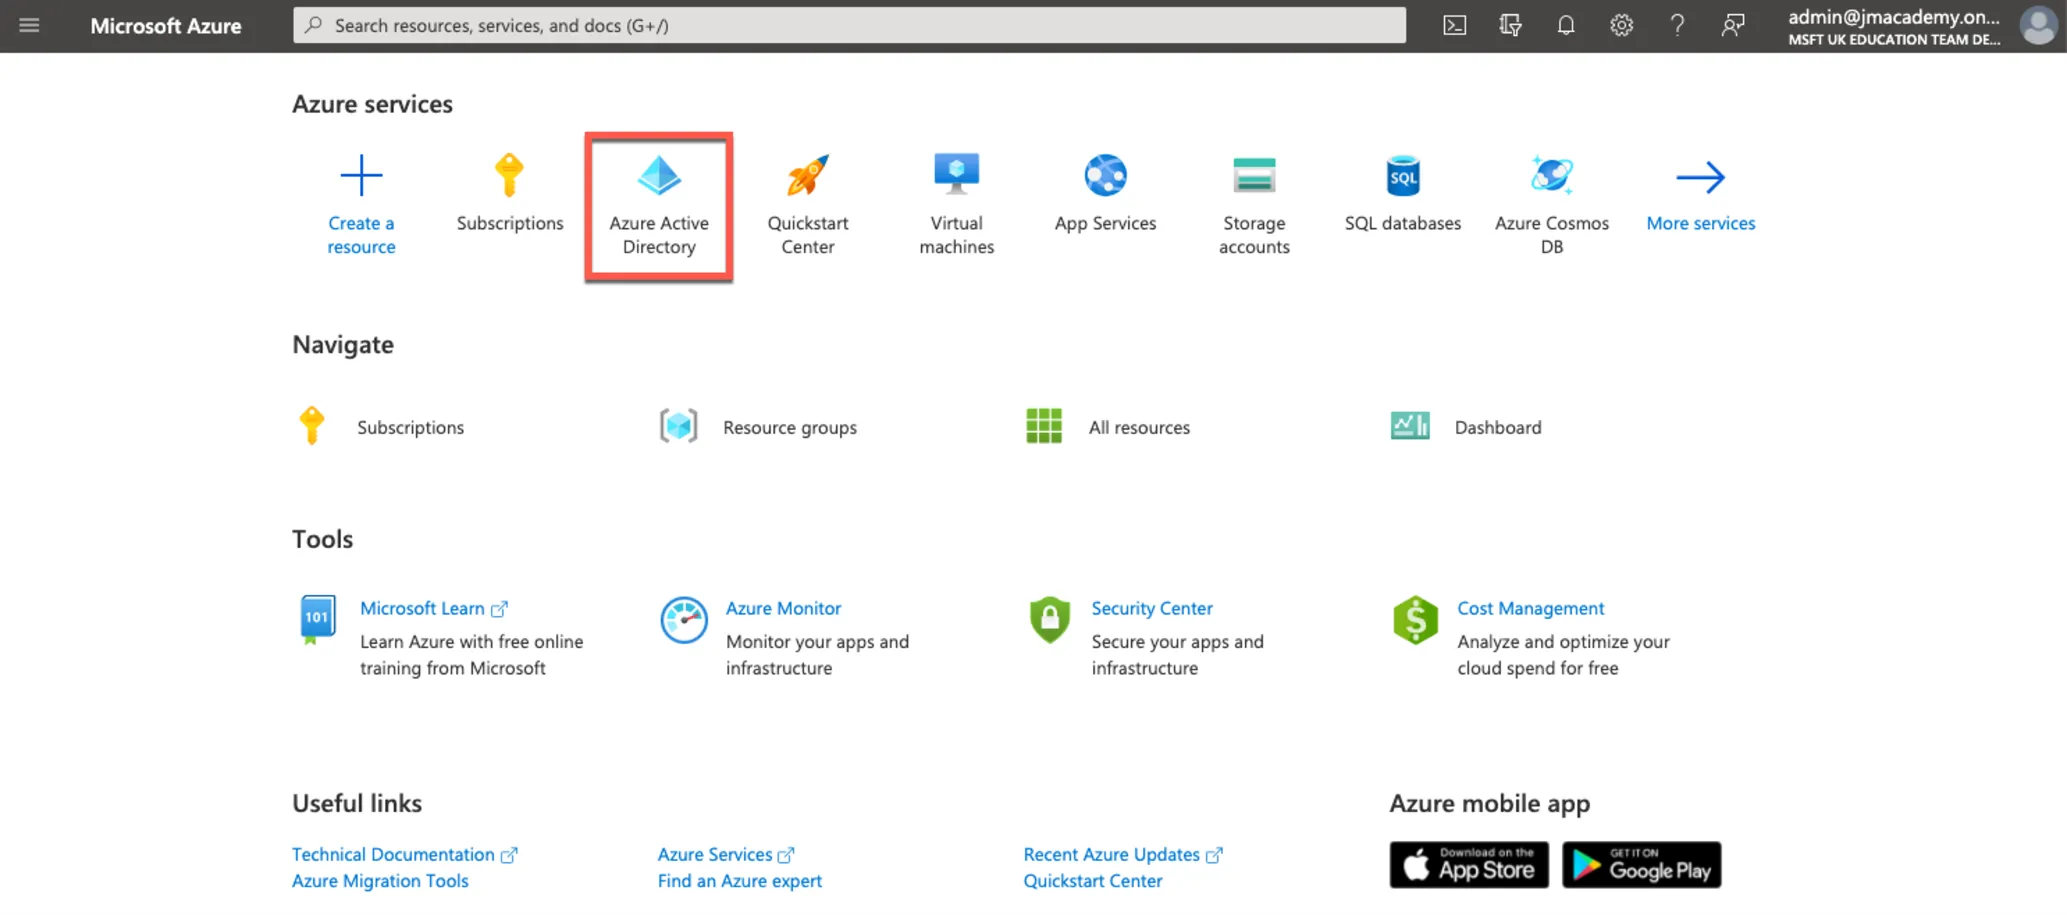
Once logged into your Microsoft Azure instance, select Azure Active Directory.
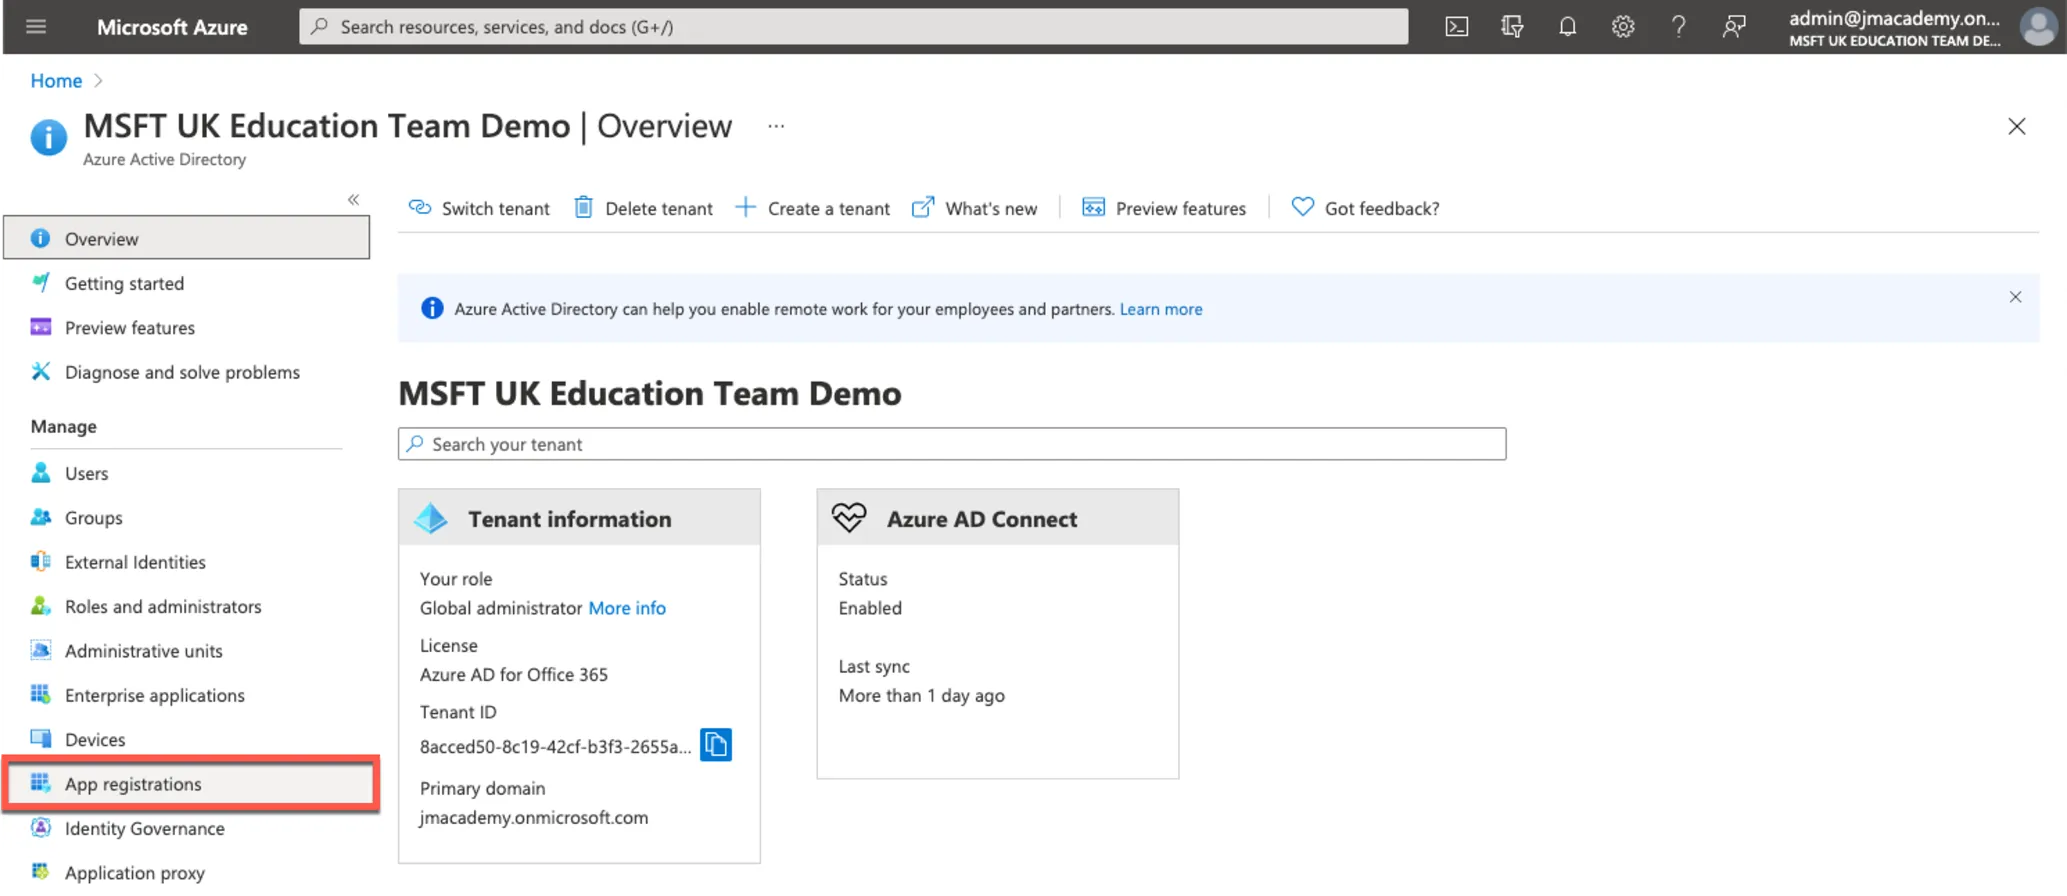
The Azure Active Directory options are displayed. Select the App Registration option.
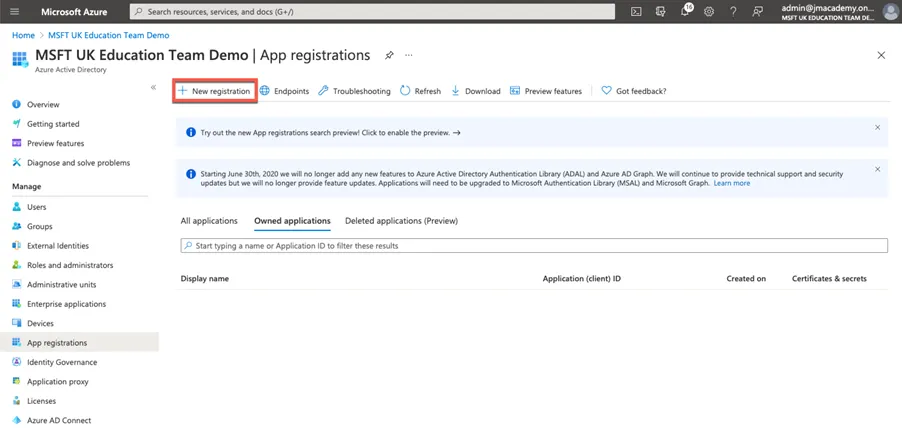
From the left-hand side menu select App registrations.
Select New Registration.
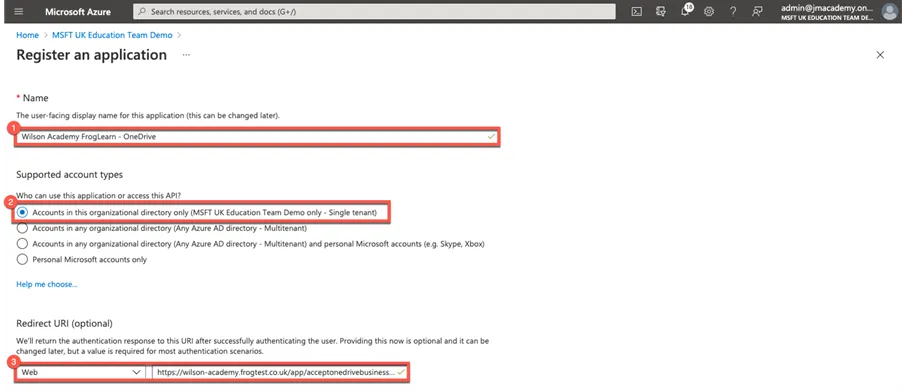
The Register an application window will be displayed. Complete the following details to register your Frog platform as an application:
- Name – Enter in a name that will allow you to easily identify the application that you are wanting to register. e.g. Wilson Academy FrogLearn – OneDrive
- Support account types – In most instances schools will be a single tenant, however the choice is up to the administrator of your Office 365 tenancy. In this example we are going to select the option Accounts in this organizational directory only
- Redirect URI – From the first drop-down box select the option Web. Next you will need to enter a specific endpoint URL (/app/acceptonedrivebusinessauth) used for communication between the Frog platform and your Office 365 tenancy for the OneDrive integration.
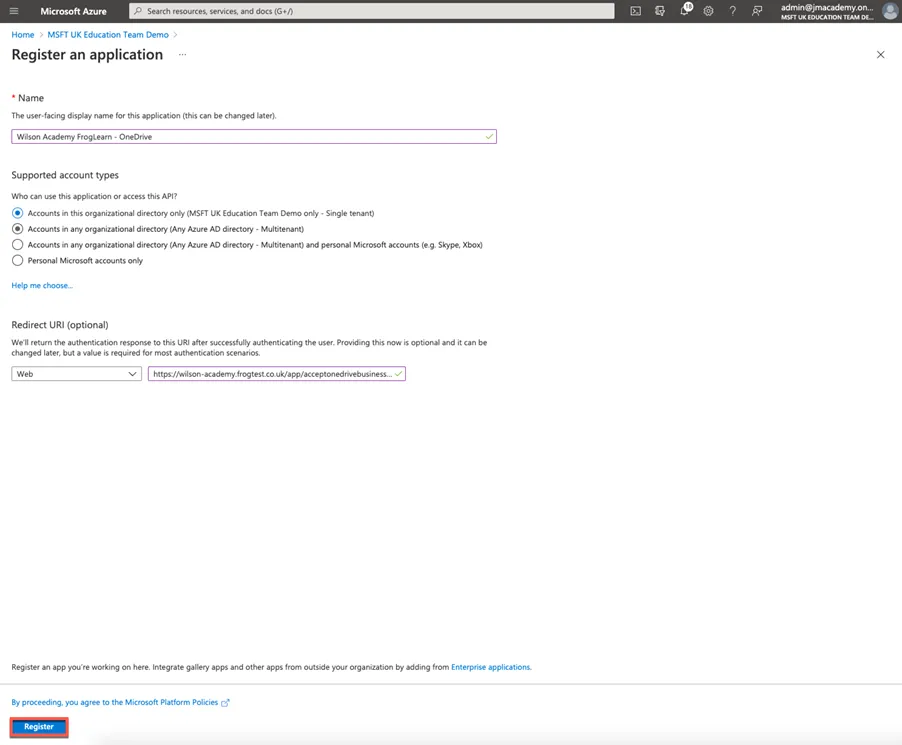
When happy with the information entered select the Register button.
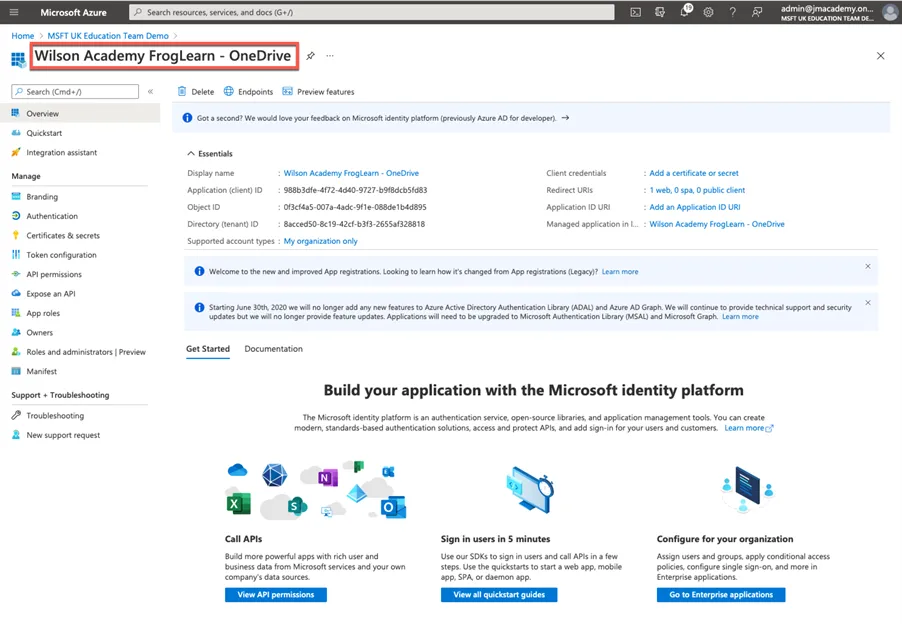
The application is created and displayed as per the details entered. In this example, all details relating to the application Wilson Academy FrogLearn – OneDrive is displayed.
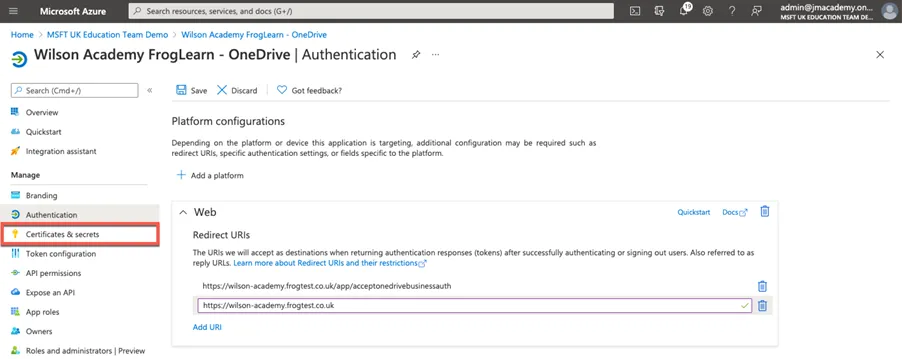
The next step is to configure a second redirect URI. From the left-hand side menu select Authentication.
Within the Authentication options, select the Add URI link within the Web section.
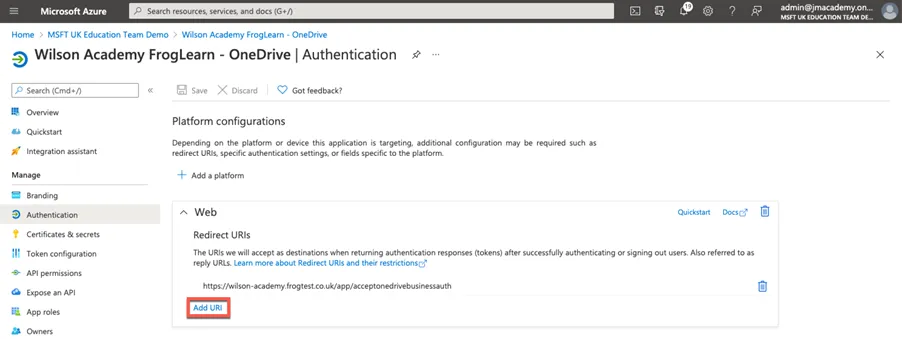
The first entry will display the endpoint (/app/acceptonedrivebusinessauth) used for communication between the Frog platform and your Office 365 tenancy for the OneDrive integration. In this example, this is:
https://wilson-academy.frogtest.co.uk/app/acceptonedrivebusinessauth
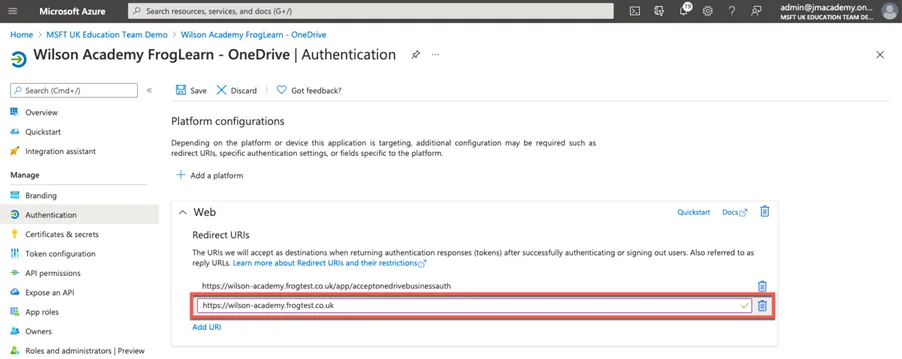
Now, in the new URL field enter your FrogLearn platform URL. In this example, this is:
https://wilson-academy.frogtest.co.uk
After this has been entered a green tick should be displayed at the end of the URL.
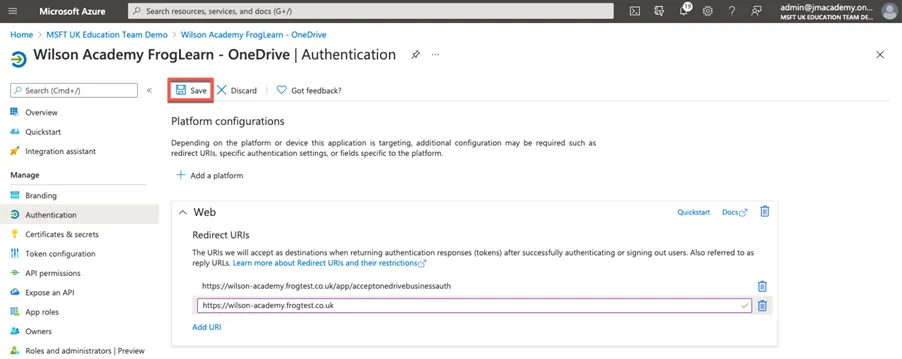
When happy with the information entered select the Save button.
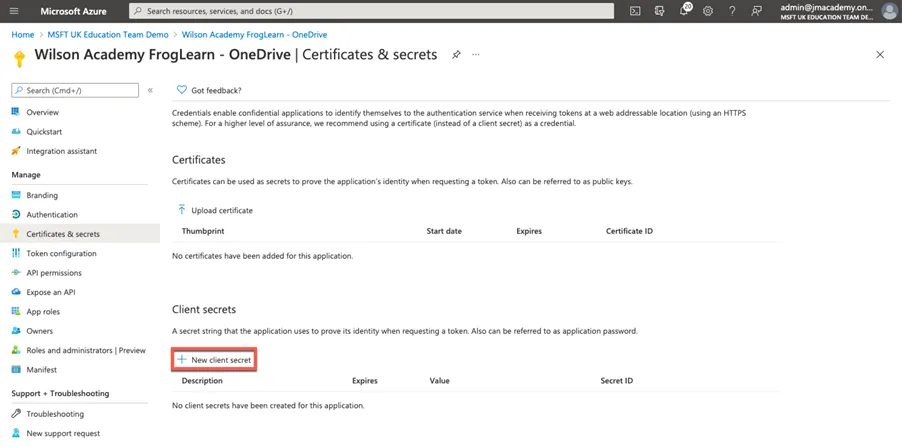
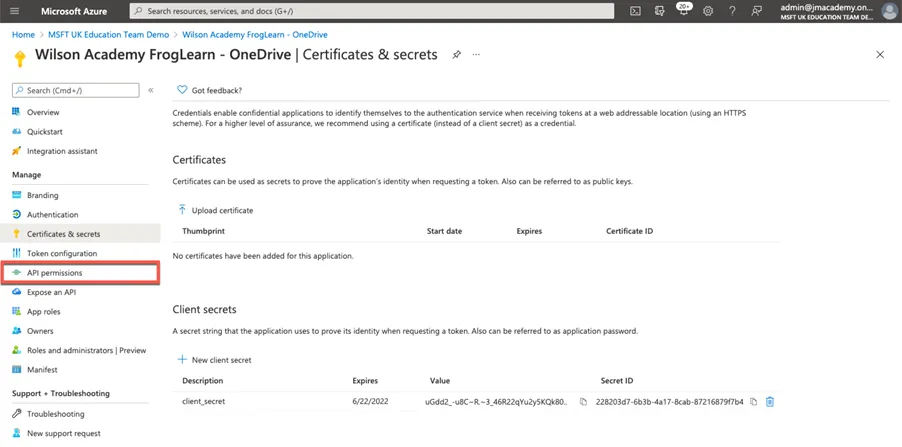
The next step is to configure a unique shared password to be used between the Frog platform and Office 365 tenancy. Select Certificates & secrets from the left-hand side menu.
Within the Certificates & secrets options, select the New client secret link within the Client secrets section.
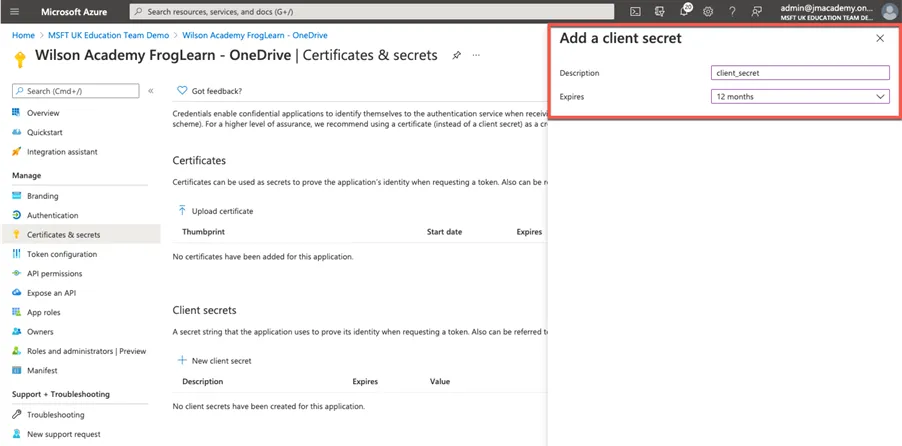
An Add a client secret pop-up window will be displayed on the right-hand side.
Complete the following fields to create a unique shared password for the OneDrive integration:
- Description – Enter the text client_secret.
- Expires – This will be up to the school as to the length of time the unique shared password between the Frog platform and Office 365 is to be active. You will have the following choices:
- Recommended: 6 months
- 3 months
- 12 months
- 18 months
- 24 months
- Custom
In this example, we have opted to select the option 12 months.
NOTE - Please keep in mind though that in a year you will need to re-generate a new unique shared password for the integration to stay active.
When happy with the information entered select the Add button.
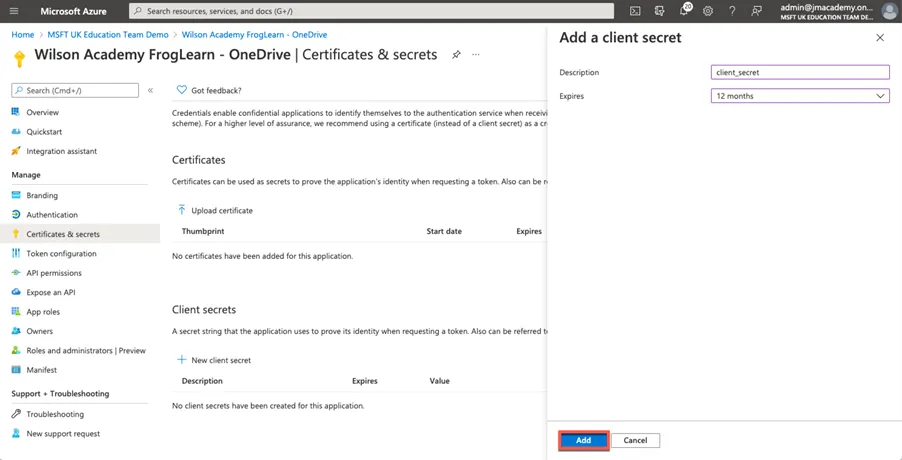
The unique shared password will be displayed under the Value field. Copy this password into a text file for use later.
NOTE – Please be aware that after you exit this page, the password can’t be retrieved again.

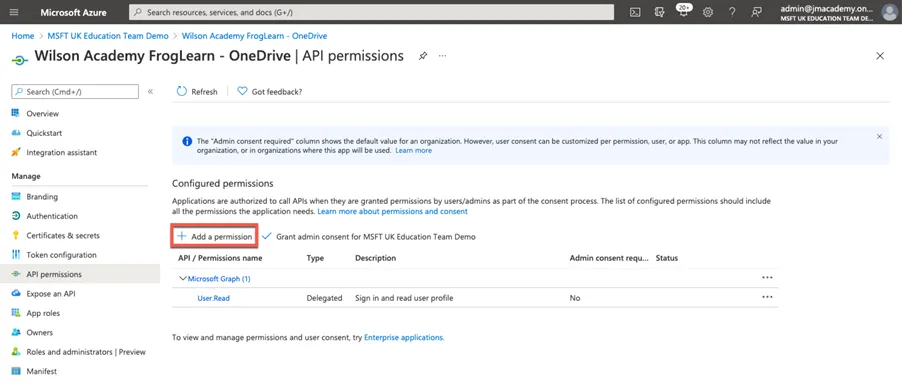
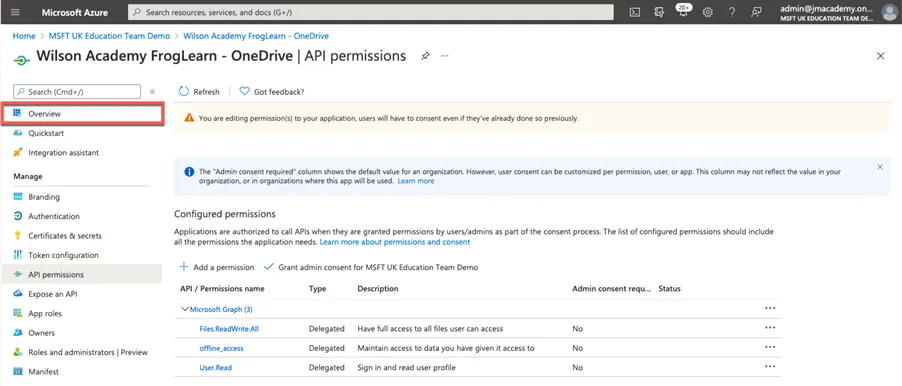
The next step is to configure the permissions the Frog platform will have to the Office 365 tenancy. Select API permissions from the left-hand side menu.
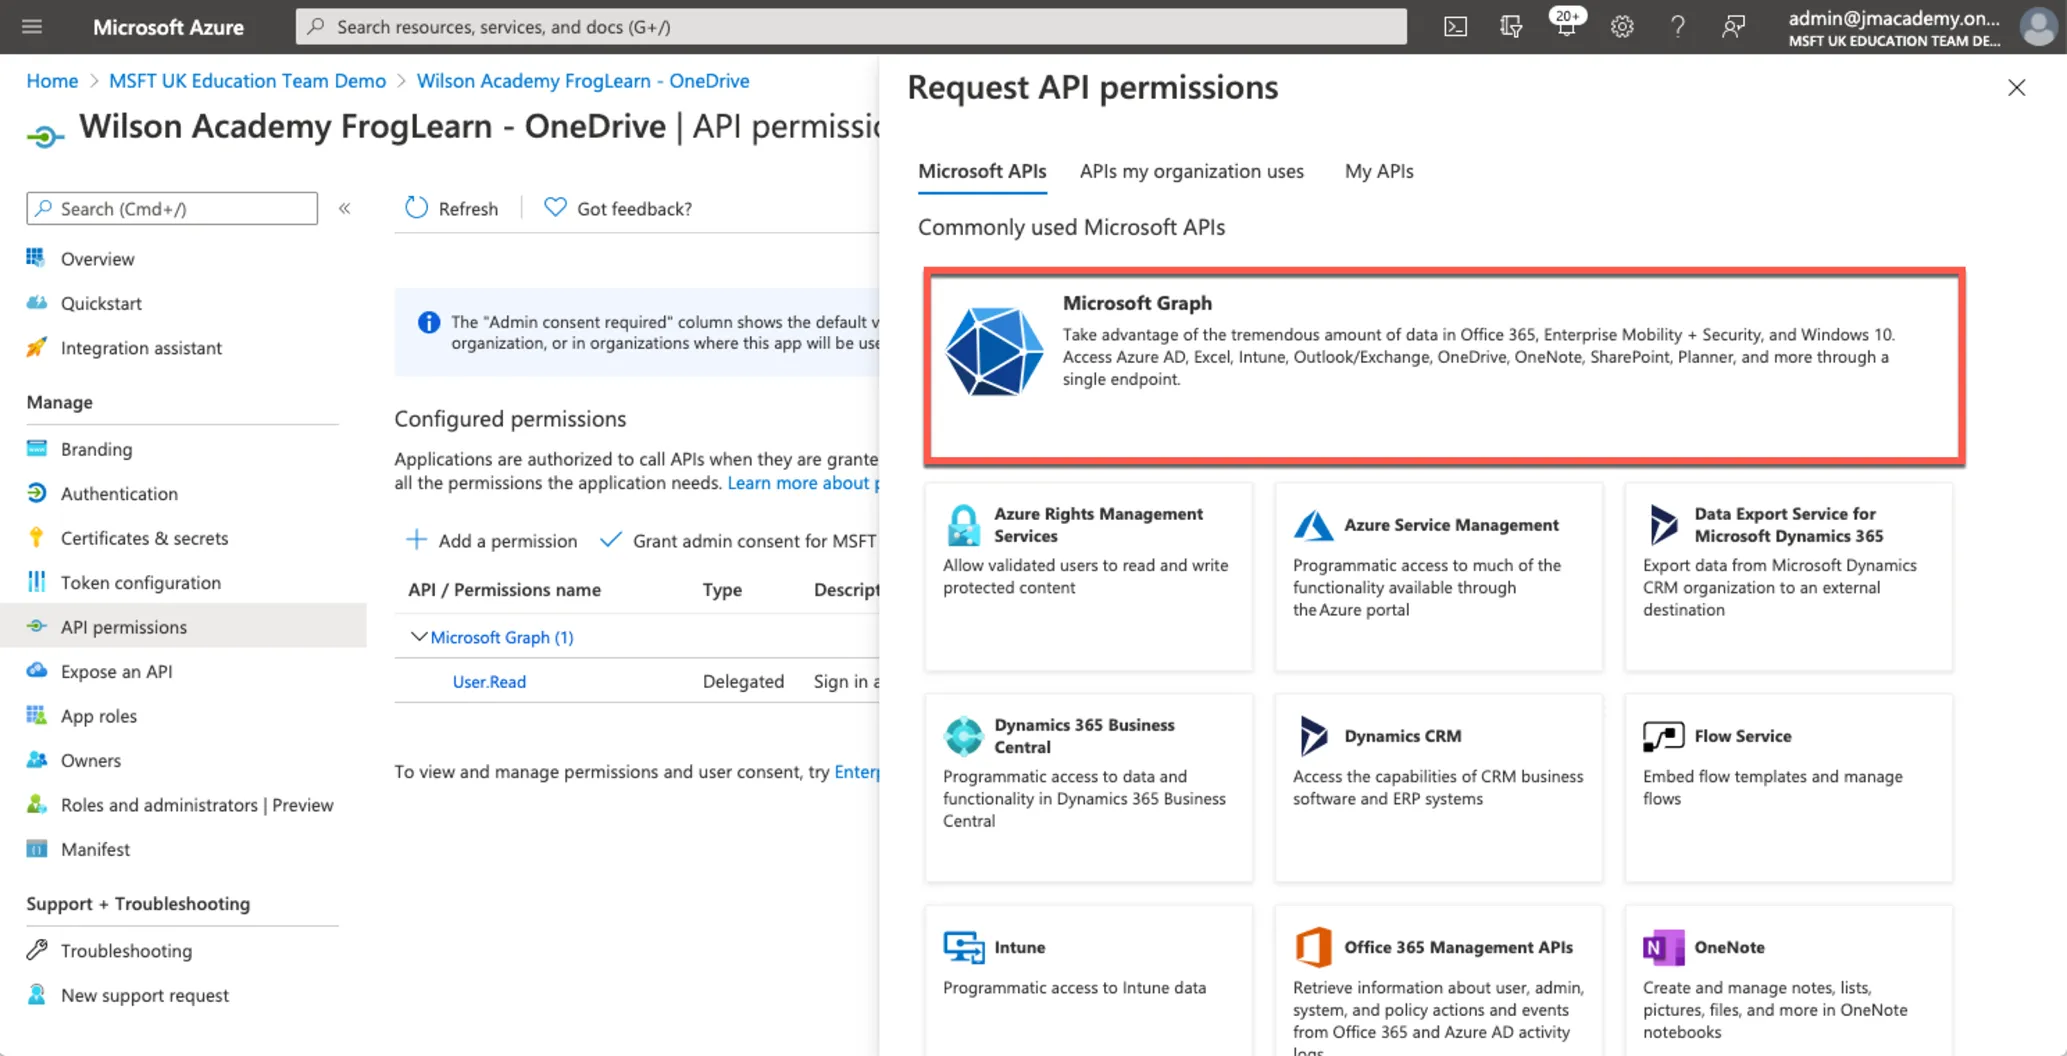
Within the API permissions options, select the Add a permission link within the Configured permissions section.
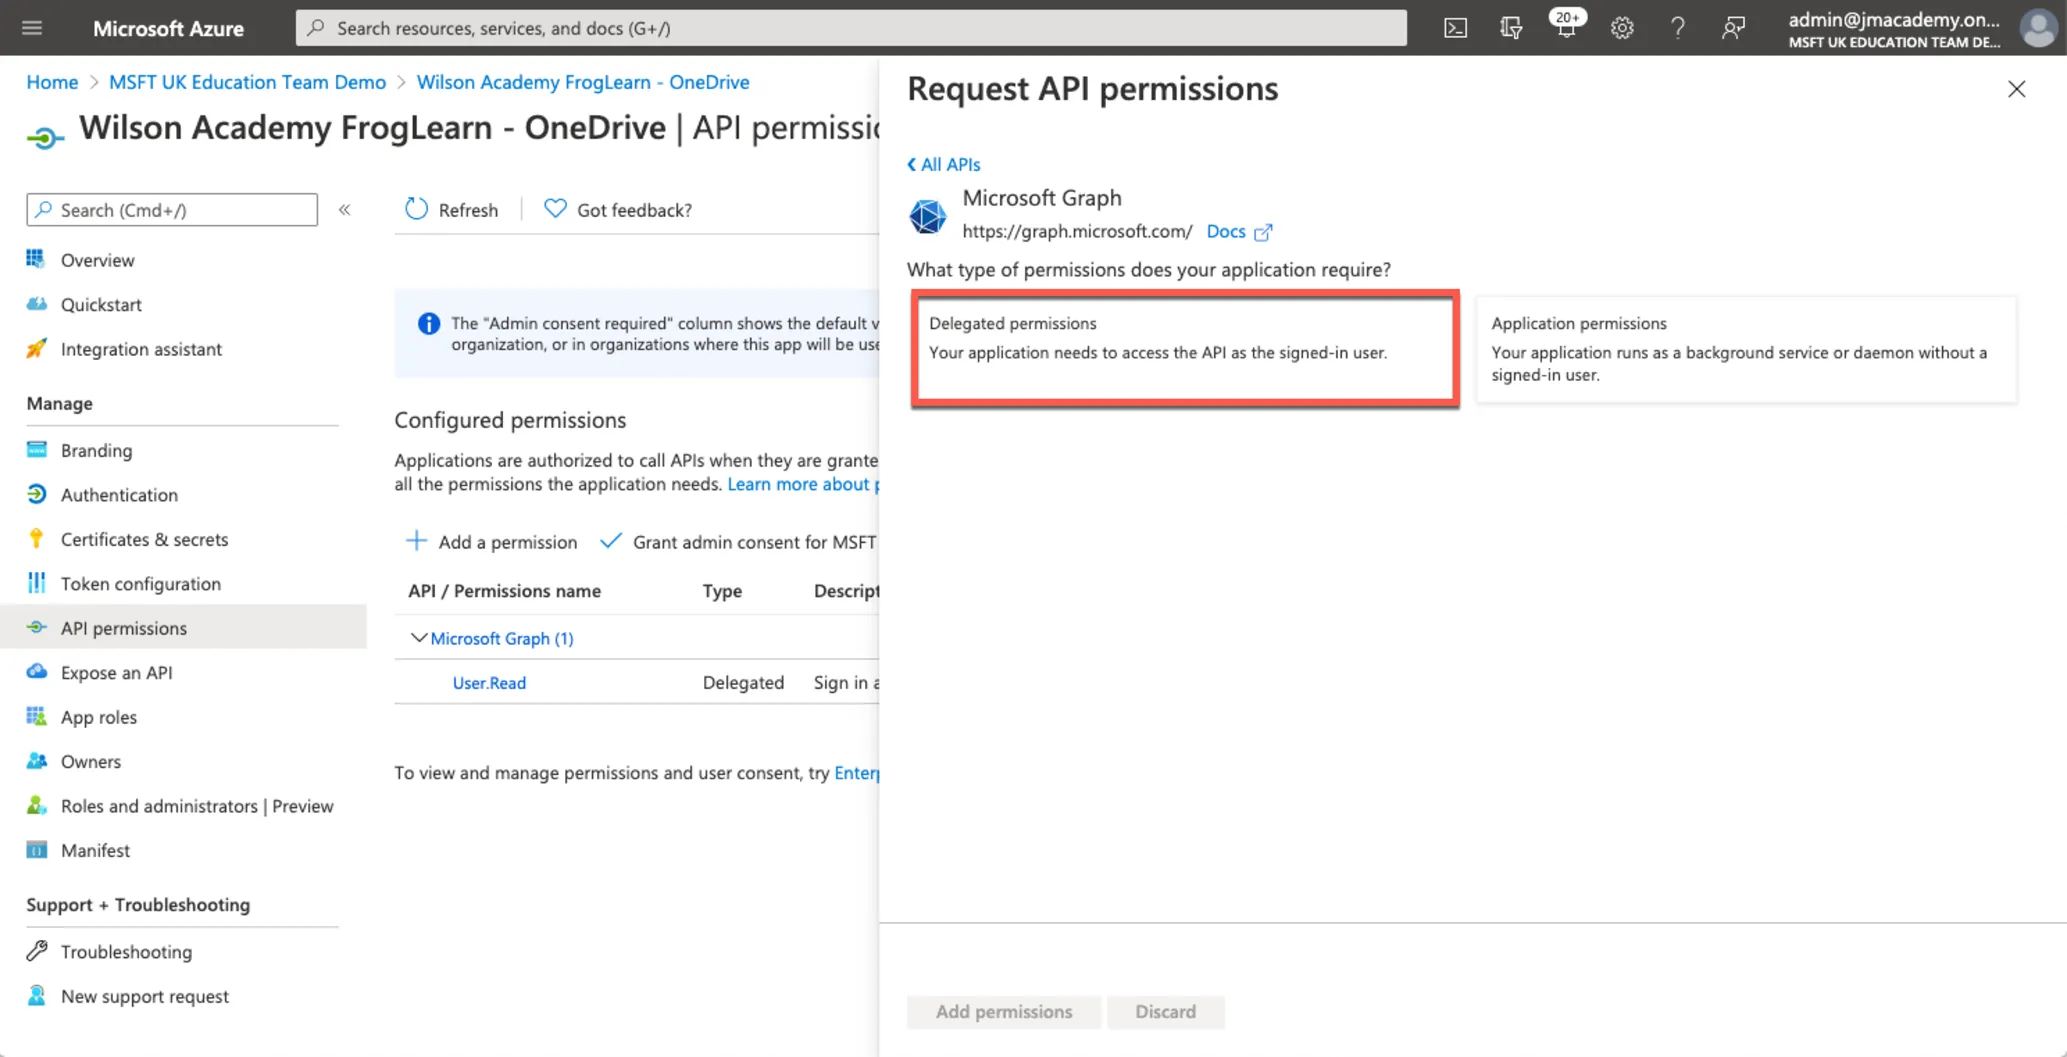
A Request API permissions pop-up window will be displayed on the right-hand side. Select the option Microsoft Graph.
Within the Microsoft Graph options, select Delegated permissions.
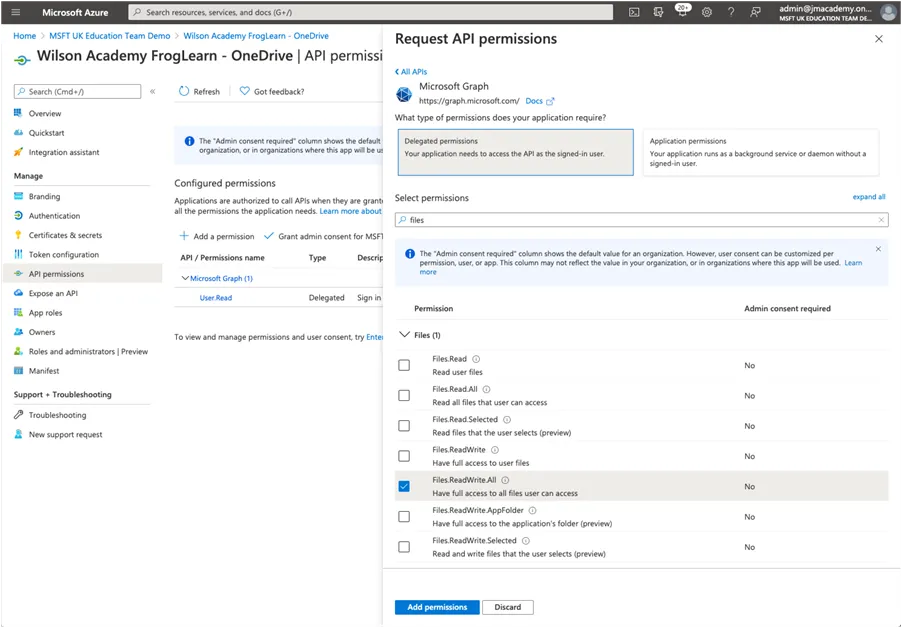
Within the search box just below Select Permissions, enter in the text files.
A search on all available permissions will be returned. Expand the Files section and then select the following option:
- Files.ReadWrite.All – Have full access to all files user can access
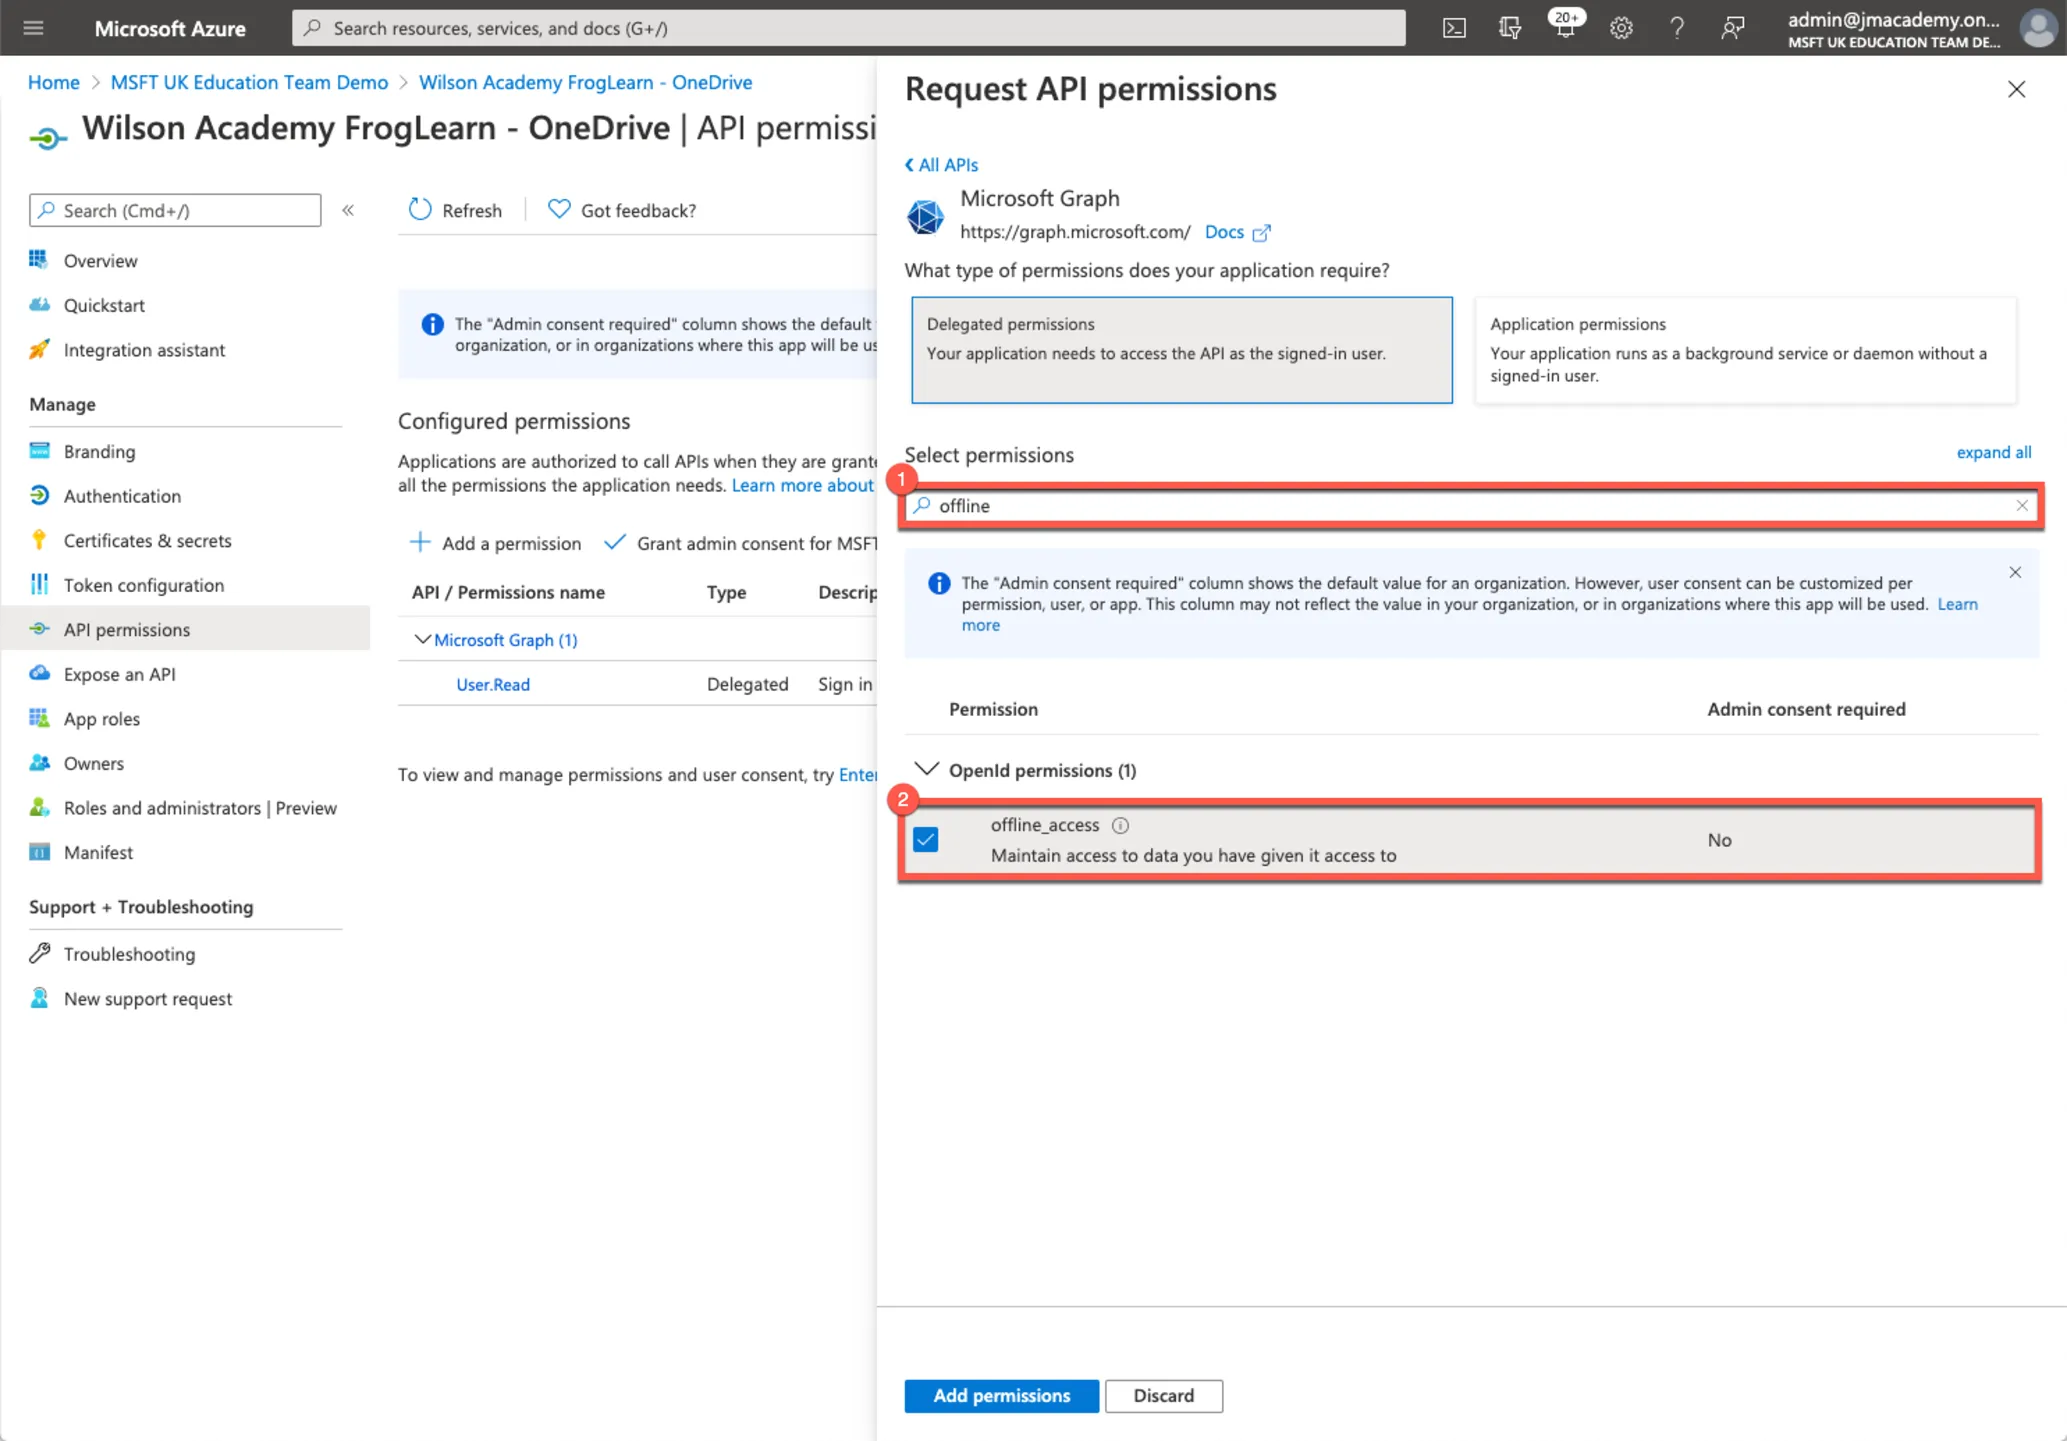
Next enter in the text offline within the search box.
A search on all available permissions will be returned. Expand the OpenID permissions section and then select the following option:
- offline_access – Maintain access to data you have given it access to
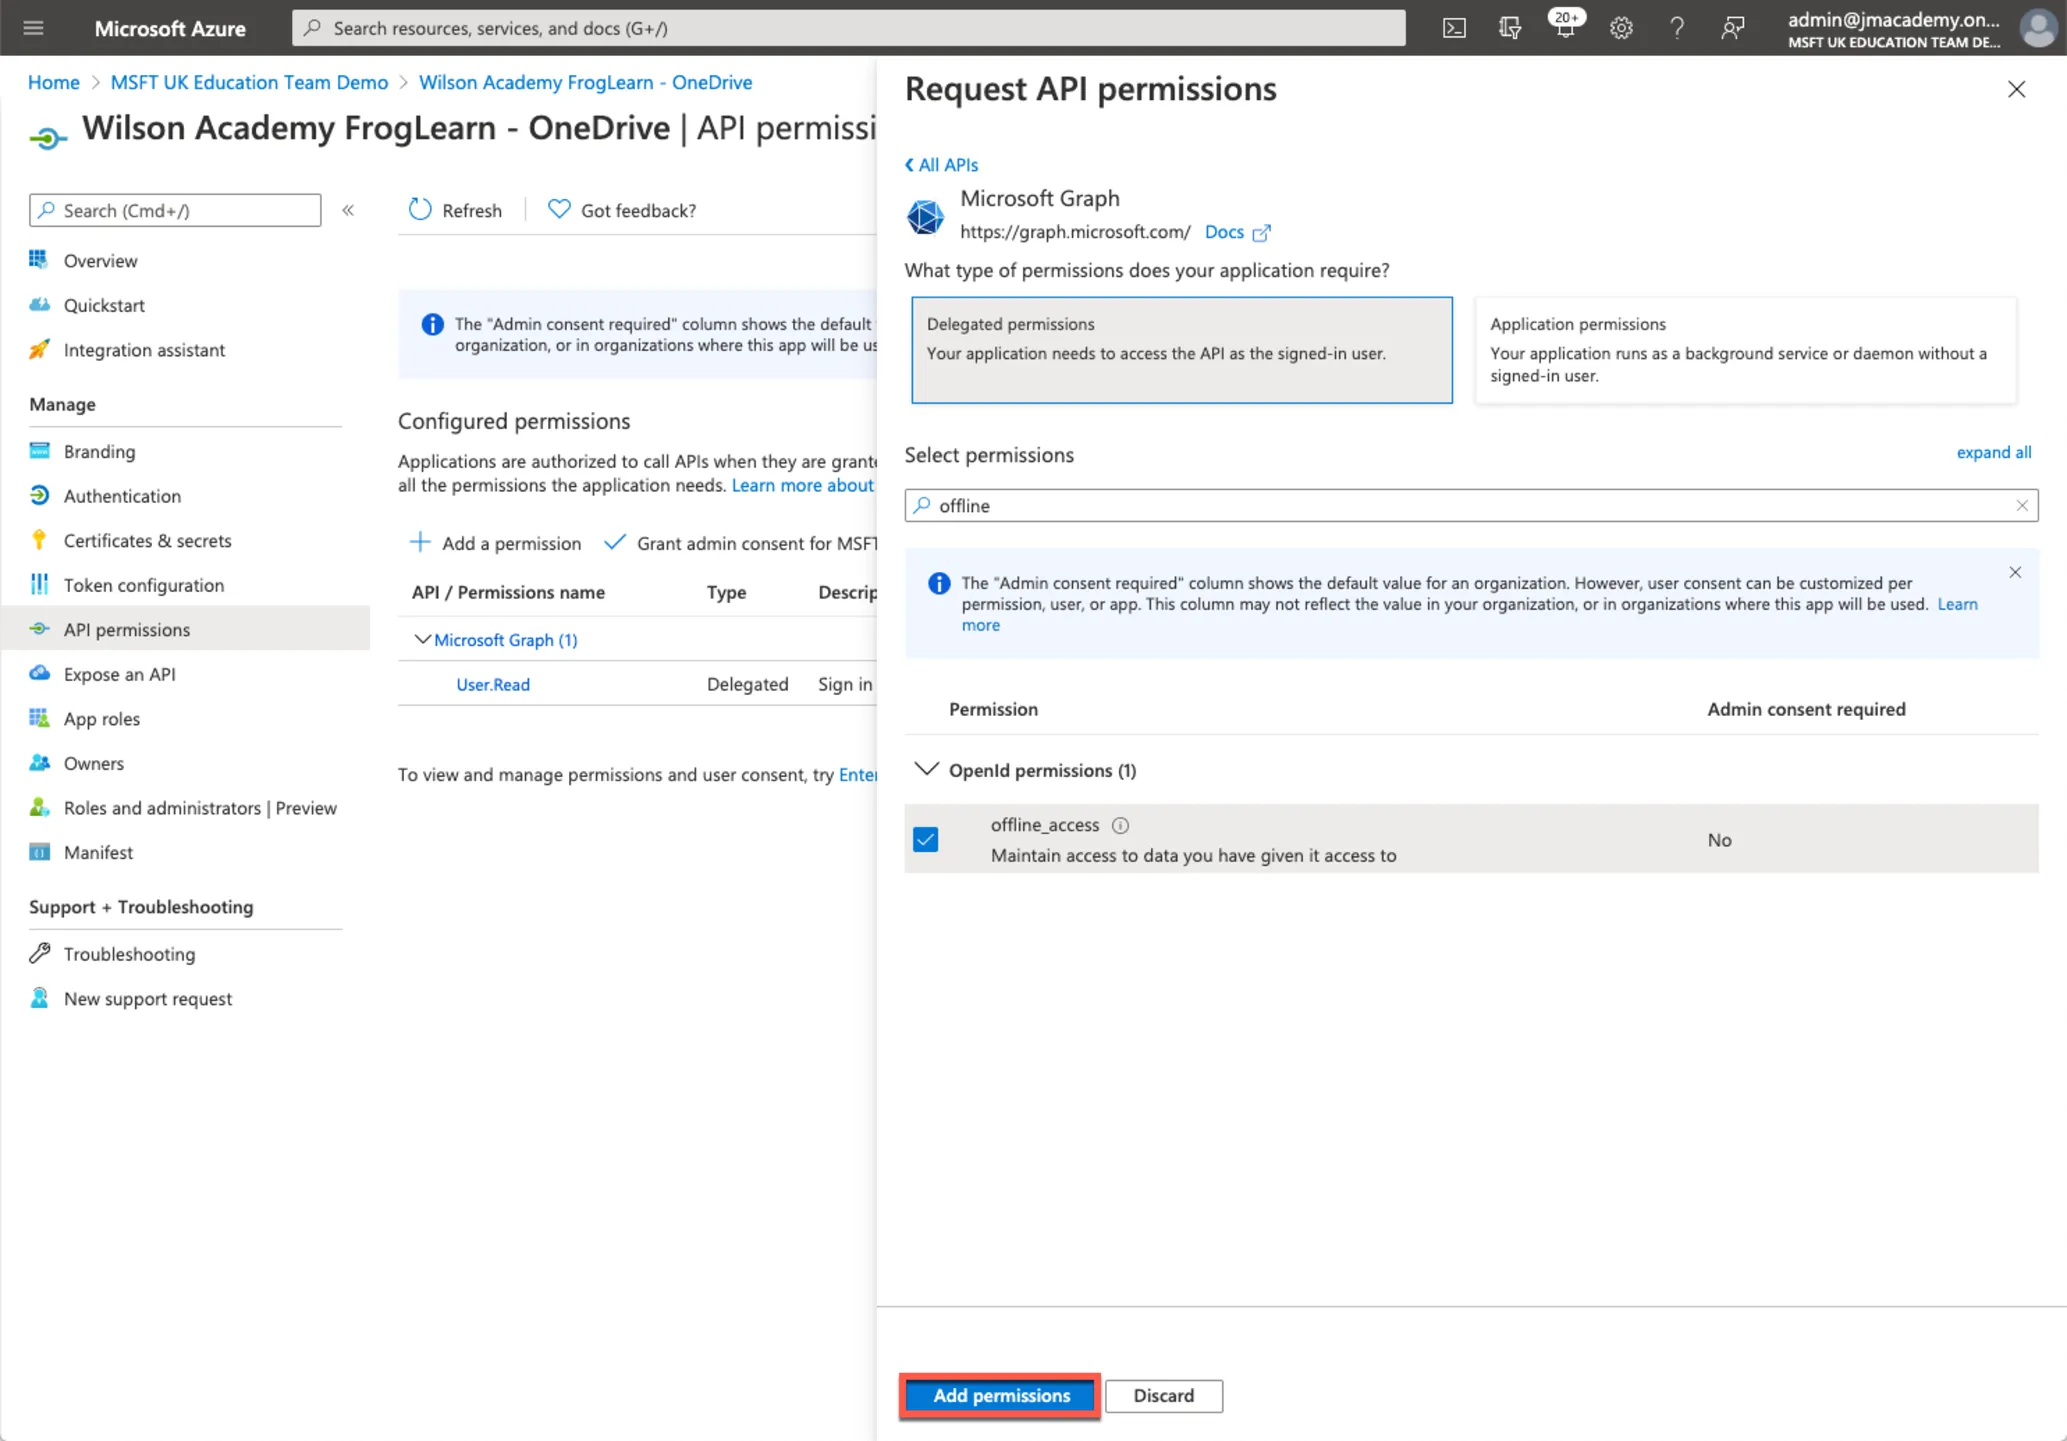
When happy with the permissions selected, click on the Add permissions button.
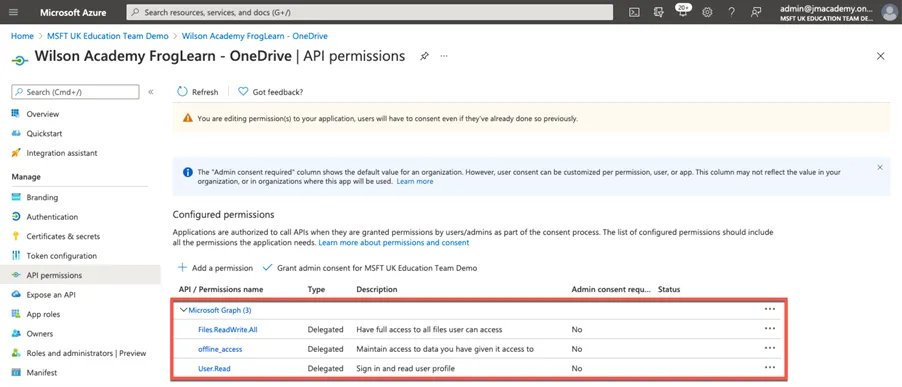
You be returned to the API permissions page. Under the section Configured permissions, you will see an overview of the API’s selected for the integration.
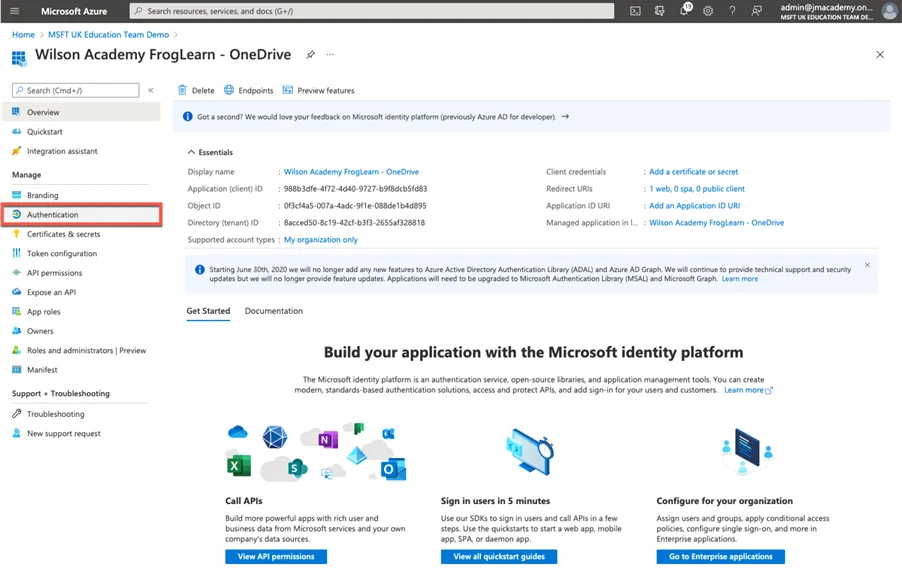
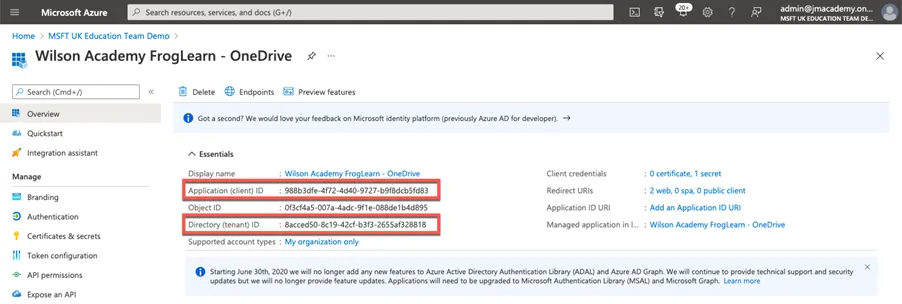
The OneDrive setup within the Office 365 tenancy is nearly completed. The last action that you need to complete is to take note of the identifiers for the fields below:
- Application (client) ID
- Directory (tenant) ID
Select Overview from the left-hand side menu.
Within the Essentials section, copy the identifiers displayed for the fields below into a text file for use later:
- Application (client) ID – e.g. 988b3dfe-4f72-4d40-9727-b9f8dcb5fd83
- Directory (tenant) ID – e.g 8acced50-8c19-42cf-b3f3-2655af328818
Just to reiterate the items that you should have noted in your text file for use later are below:
- Client Secret - uGdd2_-u8C~R.~3_46R22qYu2y5KQk80..
- Application (client) ID – 988b3dfe-4f72-4d40-9727-b9f8dcb5fd83
- Directory (tenant) ID – 8acced50-8c19-42cf-b3f3-2655af328818
Please refer to the document Office 365 - OneDrive Preferences for steps on how to configure your FrogLearn platform with your Office 365 tenancy in order to integrate OneDrive.