


Download PDF guide
Office 365 - Teams Preferences
To enable the Teams integration with FrogLearn you need to have completed the steps outlined in Office 365 – OneDrive Preferences. Upon completing the steps in this document this should see the section in System Preferences > Office 365 > OneDrive configured with the details below:
- Client Secret
- Application (client) ID
- Directory (tenant) ID
The final step ahead of staff / students being able to utilise the Teams integration is to associate an Office 365 email address with the user accounts.
Should your school wish to have single sign on between Office 365 OneDrive and the Frog platform then you may wish to consider one of the integrations below:
- Active Directory Federated Services (ADFS)
- Azure
Both integrations will be the responsibility of the school to configure, however, if you would like any guidance then please contact the Service Desk on 01422 395 939 or support@frogeducation.com.
How-to
Prior to staff being able to make use of the Teams integration within assignments, all users will need to have a Teams Email configured.
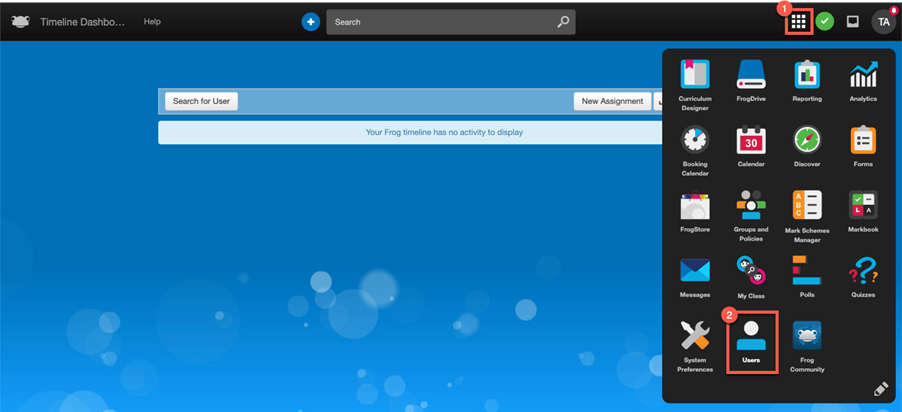
Login as an administrator and navigate to Quick Launch > Users.
After the Users application opens, the Teams Email field can be updated in two ways. If this is the first time you are setting up the Teams integration, it is recommended that the Teams Email field is updated via the CSV export / import process.
Within the Users application navigate to the Actions Cog > Export all users.

A CSV file will download to your local device. Open the CSV and look for the field labelled Teams Email Address.
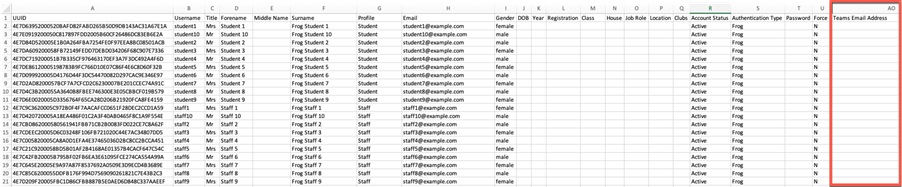
Populate the Teams Email Address field with the users Office 365 email address. For example, a teacher Tom Archer has an Office 365 email address of tarcher@support.frogosdev.co.uk. Enter this email address into the Teams Email Address field. Complete this process for all relevant users in the CSV file.
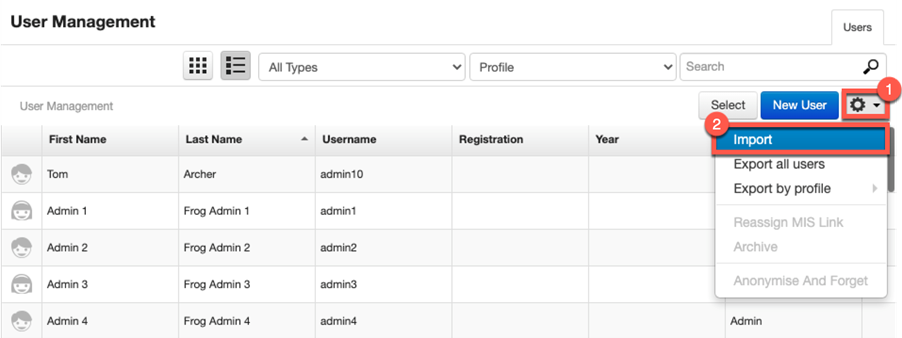
When happy save the CSV file and import this back into the Users application by selecting the Actions Cog > Import. Then follow the onscreen instructions to import the data.
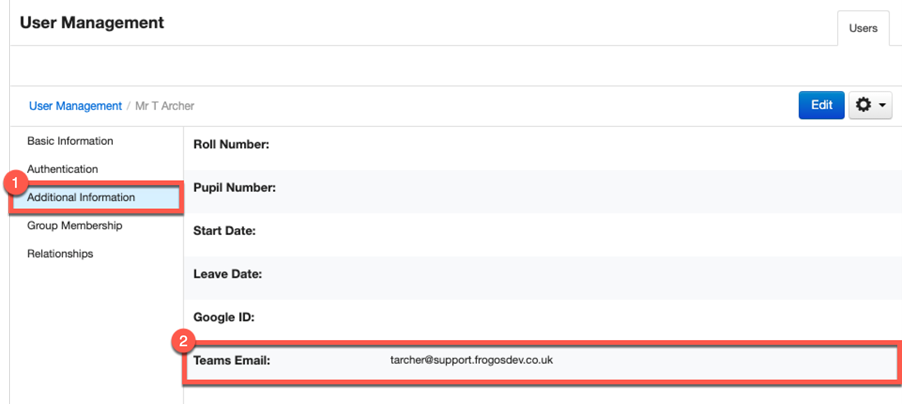
To check that the Teams Email Address has been imported successfully, search for a user and select Additional Information from the left-hand side menu. Check that the Teams Email field has been populated with the users Office 365 email address as per the CSV upload.
In this example we can see that the Teams Email is displaying as tarcher@support.frogosdev.co.uk.
Alternatively, if there a requirement to edit a few users, this can be achieved manually. Search for a user within the Users application and then select the Edit button.
In this example we are going to edit the details for a student Tracy Wilson.
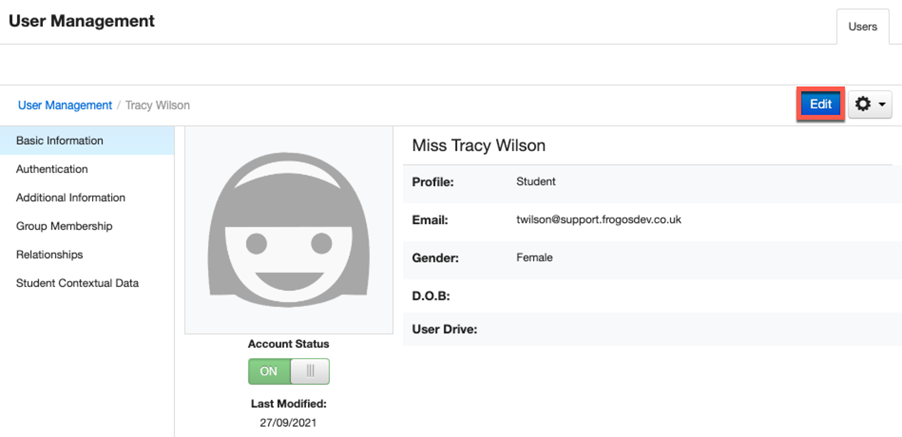
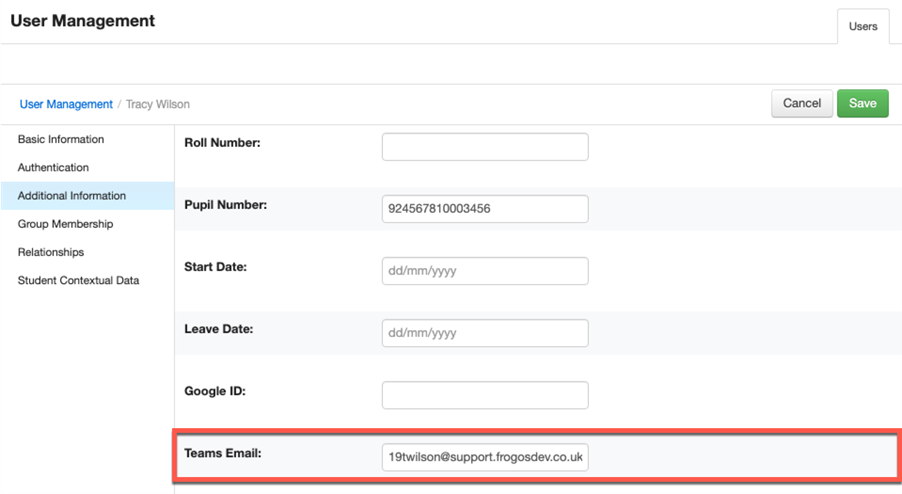
From the left-hand side menu select Additional Information.

In the Teams Email field enter the users Office 365 email address. In this example the student Tracy Wilson has an Office 365 email address of 19twilson@support.frogosdev.co.uk which has been populated into the Teams Email field.
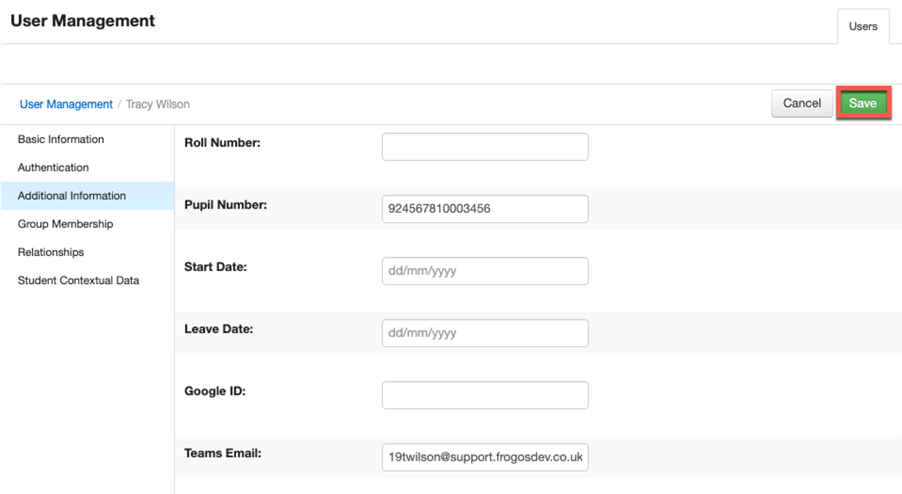
When happy with the Teams Email entered select the Save button to have the change applied immediately.
Once a Teams Email address has been entered for all users the Teams integration is now ready for staff and students to utilise within assignments. For more information on the Teams integration please refer to the document Office 365 - Teams User Guide.