Download PDF guide
Office 365 - OneDrive User Guide
The OneDrive integration with FrogLearn allows you to create and edit OneDrive documents either via My Documents or the OneDrive area in FrogDrive. All of these actions can be completed without the need to leave the FrogLearn platform.
Should your school wish to have single sign on between Office 365 OneDrive and the Frog platform then you may wish to consider one of the integrations below:
- Active Directory Federated Services (ADFS)
- Azure
Both integrations will be the responsibility of the school to configure, however, if you would like any guidance then please contact the Service Desk on 01422 395 939 or support@frogeducation.com.
If you do not want to proceed with a single sign on option, users will be required to enter their Office 365 login credentials when creating or viewing OneDrive documents within FrogDrive.
How-to
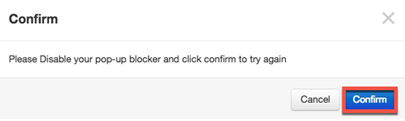
After the OneDrive integration has been configured in FrogLearn, when you navigate to FrogDrive, a pop up window may appear asking you to disable your pop up blocker. This will differ depending on the browser you are using.
Once the pop up blocker has been disabled within the browser, click on the Confirm button.
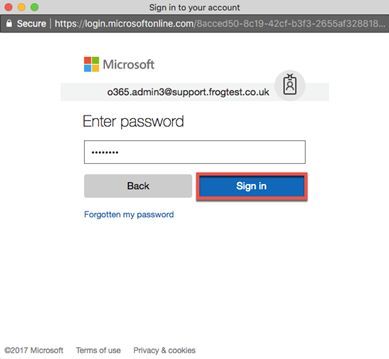
A Microsoft pop-up window will appear asking you to enter your username. Enter your Office 365 email address and then click the Next button.

The next pop up window will prompt you to enter the password associated with your Office 365 account. After you have put in your password select the Sign in button.
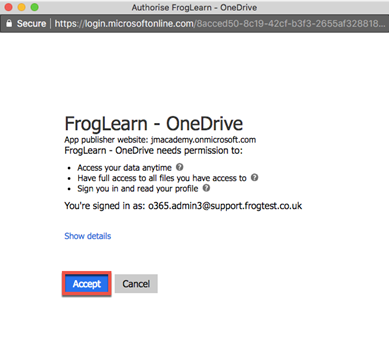
A Microsoft pop up window will appear requesting permission for OneDrive and FrogLearn to communicate. Click on the Accept button.
From this point forwards users will only be required to enter their Microsoft credentials when launching FrogDrive in new FrogLearn sessions.
You may see a spinning Frog head that lasts slightly longer than usual the first time you complete this process. This is because FrogDrive is synchronising your OneDrive account with FrogDrive and storing a cache of your files for quick and easy access.
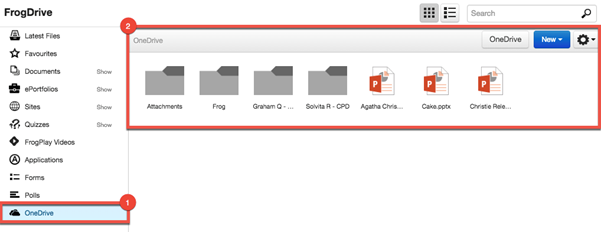
After the synchronisation process completes, you will see within FrogDrive a new area called OneDrive. When selected, all your folders and files within your Office 365 OneDrive account are displayed.
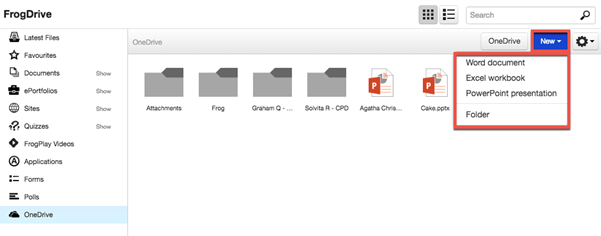
To create a new Office 365 document, navigate to the New button and choose from one of the following types of documents to create:
- Word document
- Excel workbook
- PowerPoint presentation
- Folder
In this example, we have selected Word document. A file is created and you will be prompted to provide a name for your file.
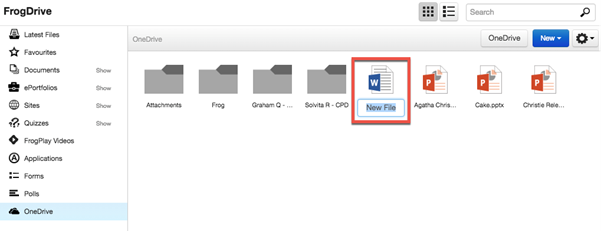
After assigning a name to your file, double click on your file to open up the preview window.
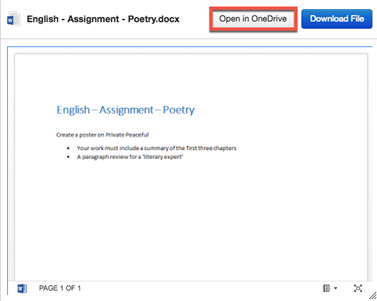
As this is a newly created file there won’t be any content to display. To edit your Word document, select the Open in OneDrive button.
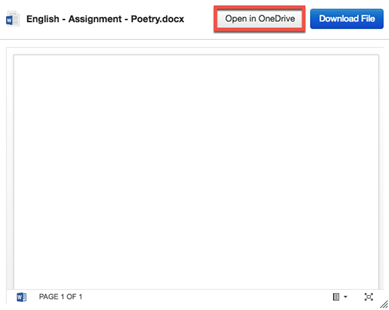
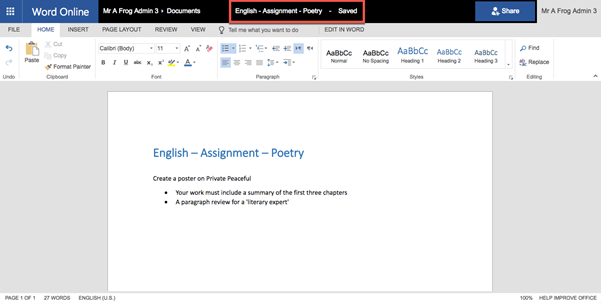
Your Word document will launch in a new tab within your browser allowing you to edit your document.
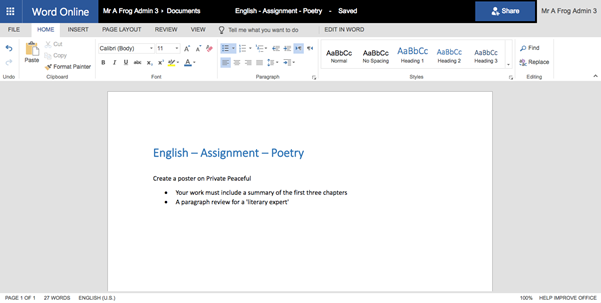
As you edit your Word document the changes will be saved automatically. However, it is worth checking ahead of closing the Office 365 browser tab, that the Word document has been saved successfully. You can identify this easily by the word Saved appearing in the title bar.
The file is automatically synchronised to OneDrive, and in turn will display within FrogDrive > OneDrive.
If you double click on the Word document you have recently edited, your edited document will be displayed within the preview window. To edit your document again select the Open in OneDrive button.
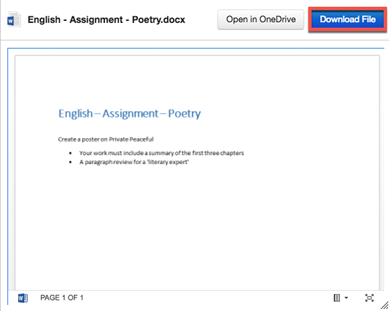
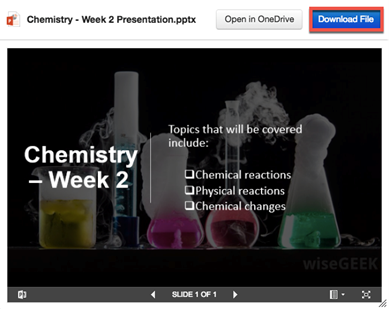
To download a copy of the Word document to your local device, select the Download File button from the preview window.
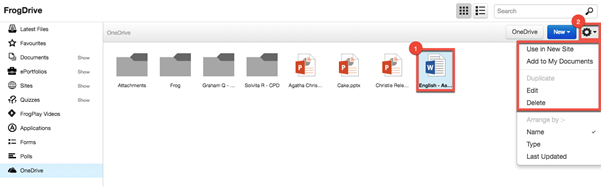
Additionally, if you select an Office 365 document from within FrogDrive > OneDrive and navigate to the Actions Cog you will be able to complete additional actions such as:
- Use in new site – A new site is created and the Office 365 document is displayed via the OneDrive Preview widget. More information on the OneDrive Preview widget can be found in the Christie release notes.
- Add to My Documents – A shortcut link to the Office 365 document is placed within FrogDrive > Documents > My Documents. You can then access the Office 365 document via either location and any changes are automatically made to the single source of the Office 365 document.
- Edit – The selected Office 365 document will launch in a new tab within your browser allowing you to edit your document.
- Delete – The selected Office 365 document will be removed from your OneDrive.
Office 365 documents can also be created via FrogDrive > Documents > My Documents. Select New > Office 365 and then choose a document type to create.
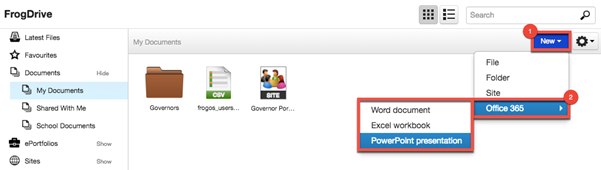
In this option, the PowerPoint presentation document type was selected. A file is created and you will be prompted to provide a name for your file.

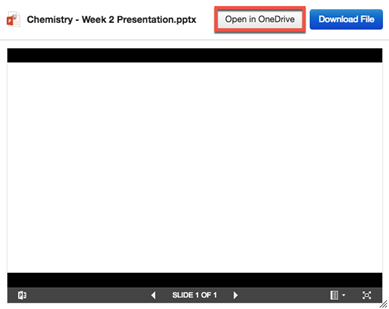
After assigning a name to your file, double click on your file to open up the preview window.
As this is a newly created file there won’t be any content to display. To edit your PowerPoint presentation, select the Open in OneDrive button.
Your PowerPoint presentation will launch in a new tab within your browser allowing you to edit your document.
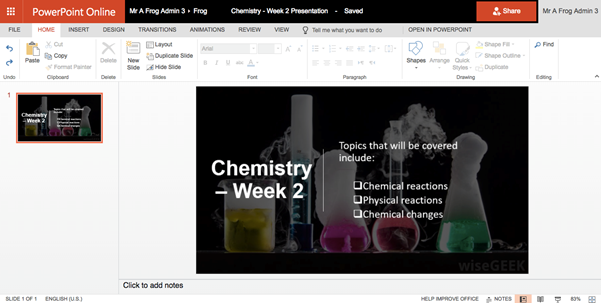
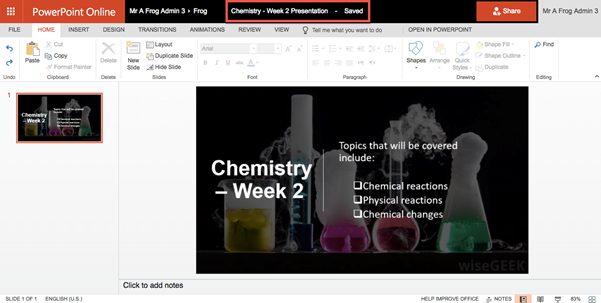
As you edit your PowerPoint presentation the changes will be saved automatically. However, it is worth checking ahead of closing the Office 365 browser tab, that the PowerPoint presentation has been saved successfully. You can identify this easily by the word Saved appearing in the title bar.
The file is automatically synchronised to OneDrive, and in turn will display in the following locations:
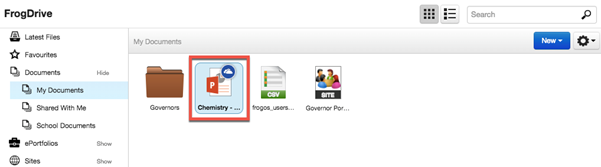
- FrogDrive > Documents > My Documents
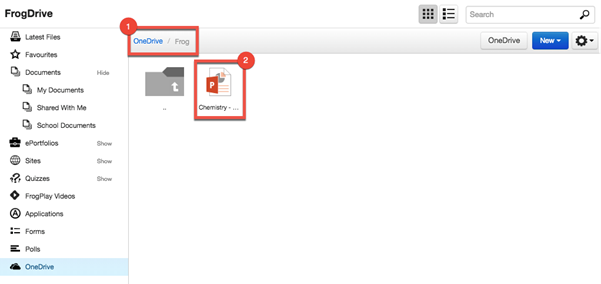
- FrogDrive > OneDrive > > Frog
- NOTE – Office 365 documents that are created via FrogDrive > Documents > My Documents will always appear in the OneDrive area under a bespoke Frog folder.
If you double click on the PowerPoint presentation you have recently edited, your edited presentation will be displayed within the preview window. To edit your document again select the Open in OneDrive button.
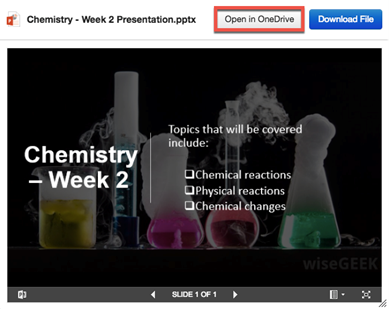
To download a copy of the PowerPoint presentation to your local device, select the Download File button from the preview window.
Deleting an Office 365 document will react in different manners depending on where the delete occurs:
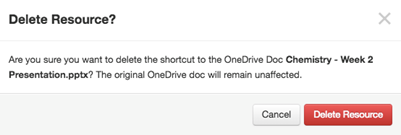
- Deleting an Office 365 document from within FrogDrive > Documents > My Documents:
- The shortcut link for the selected Office 365 document, located within FrogDrive > Documents > My Documents will be removed.
- The Office 365 document will still exist within the FrogDrive > OneDrive > Frog folder. Should the link have been removed by accident this can be restored by selecting the Office 365 document and going to the Actions cog > Add to My Documents.
Example OneDrive delete confirmation message from FrogDrive > Documents > My Documents:
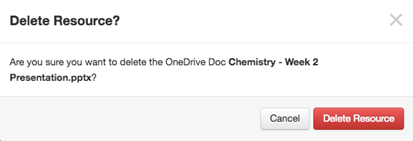
- Deleting an Office 365 document from within FrogDrive > OneDrive:
- The document is removed from the OneDrive area.
- Should a shortcut link exist within FrogDrive > Documents > My Documents this will still be retained as the Office 365 document link is still active, however, exists within the Recycle Bin location within OneDrive. If the file was removed by accident this easily be restored by accessing OneDrive > Recycle Bin directly and then restoring the file.
Example Office 365 delete confirmation message from FrogDrive > OneDrive:
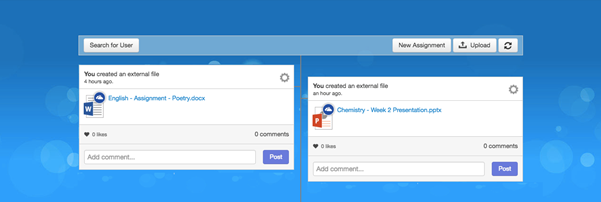
Lastly OneDrive documents that are created via FrogDrive (either within the OneDrive or Documents area) will display on your timeline, with a blue OneDrive symbol (clouds) in the top right-hand corner of the document icon.