Take a look at what's in the latest Frog Release - Discover Hopper
Using FrogSnap
4 Tables have been setup with instructions for 4 different tasks. You will be grouped together in 4's and have 5 minutes at each table to complete each task.
Logging In
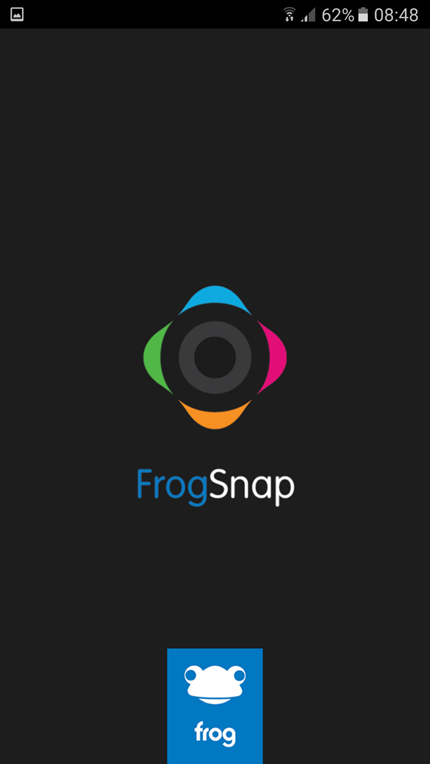
Once FrogSnap has been downloaded, when you launch the app you will be presented with the following loading screen.
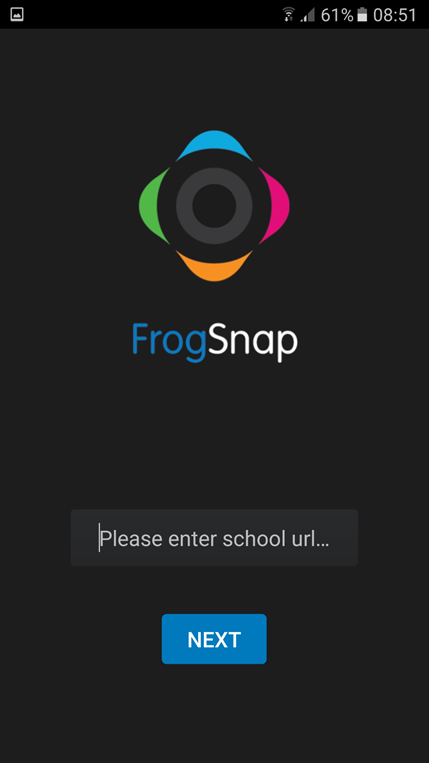
Once the app has loaded you will be presented with a text box where you must enter the URL (web address) of your FrogLearn platform.
For example: secondary-ic.frogos.net
Please Note: Your school must have a valid SSL certification in place.
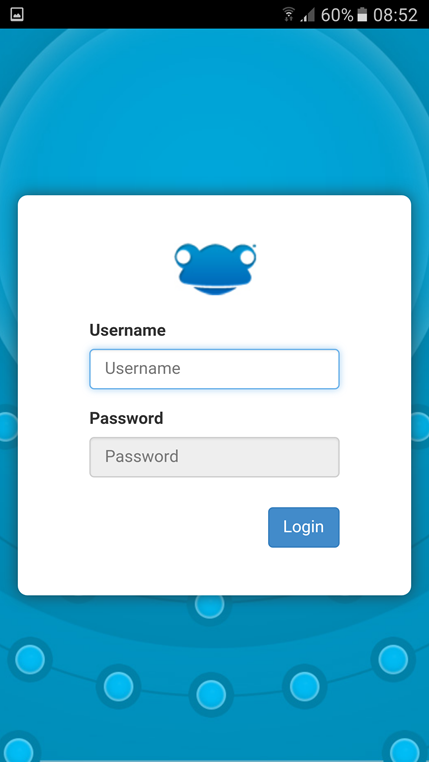
Once you have entered the Frog Server URL and hit the blue "next" button you should be provided with the FrogLearn login screen for that platform. Here you will need to login with your FrogLearn platform login credentials.
Once you have entered the correct username and password and hit "login" you will first be presented with the following screen asking you to allow this application access to your Frog account/ID.
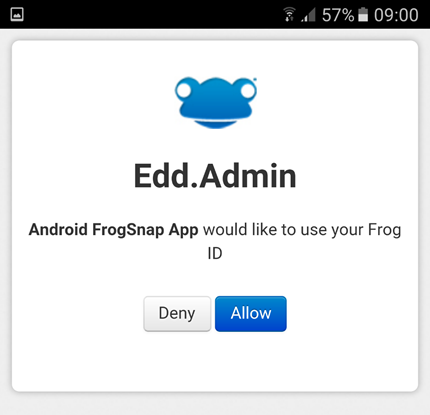
Clicking "allow" will log you into FrogSnap and allow you start taking photos/videos/audio clips. Clicking "deny" will return you to the FrogLearn login page.
Taking Photos/Videos/Audio
Once you have logged into FrogSnap you are then able to begin taking media to upload to a site.
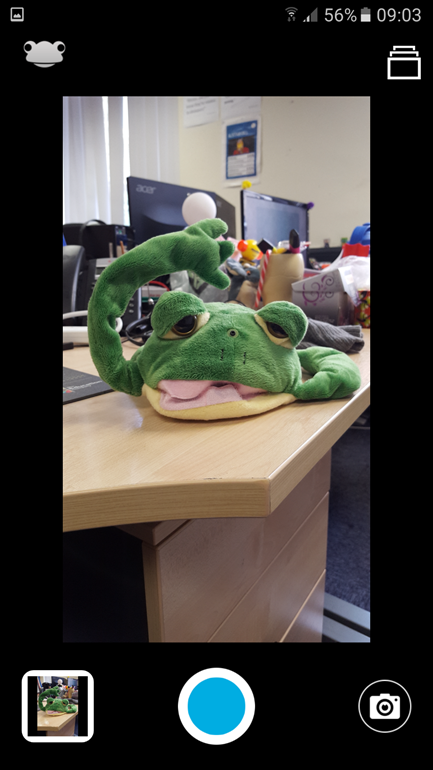
In the central area of the application you will see the camera view from your mobile device.

In order to take photos (as this is the default media type) you simply need to aim your camera at the item in question the hit the bottom central blue button.

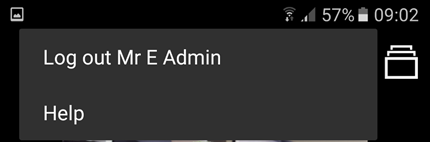
Clicking the Frog head at the top left of the application will allow you to log out of the application or click "help" to load an in app guide for using FrogSnap. Clicking away from the dropdown menu will hide the dropdown once more.
At the time of writing (12/08/16) the Apple version of Frogsnap also has the following icon below, located at the top right of the app, allowing you to change the app to utilise the front camera. Clicking this again will return you to the primary camera on the back of the device.

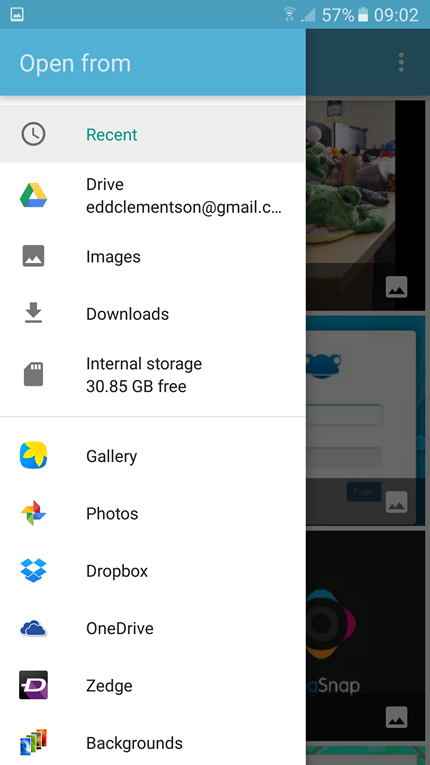
At the very top right of the application is the "camera roll" icon.

When this icon is selected you will be shown the "recent" files on your mobile device.
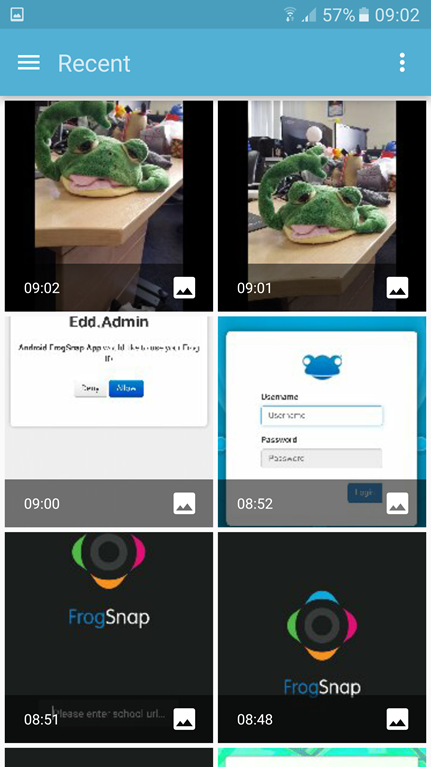
From here you can single left click to select a media item or click the vertical 3 dots icon to be shown the "open from" menu to navigate to other folders/areas on your mobile device to find and select mroe media to import into the application.
Back in the main app camera view, you are able to swap between taking photos, videos or audio clips by hitting the bottom right icon to reveal the following options.
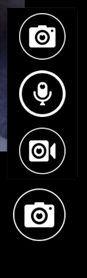
Selecting that media type will minimise this popup menu allowing you to then take/record the media. Once a media item has been captured, a preview will be shown at the bottom left of the application. You are able to take muiltiple photos etc but the last taken media item will be shown in the very bottom left of the application..
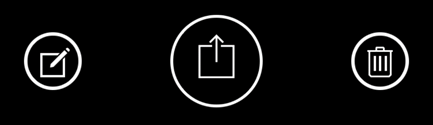
Clicking the small preview will take you to the editing area for captured media. You are able to swipe left and right between each media item.
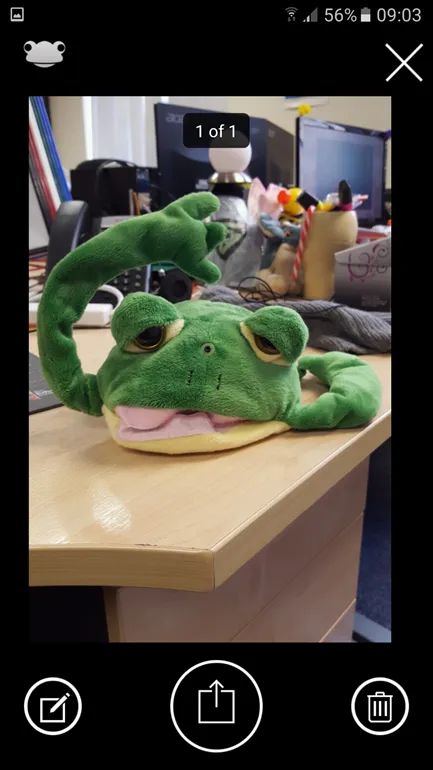
Audio clips and video clips are playable, whereas with pictures you are able to edit them further by clicking the following icon at the bottom left of the preview window.

This will open up the photo editor. Here you are able to download packs in order to add stickers, frames, effects, or even just write on the image.
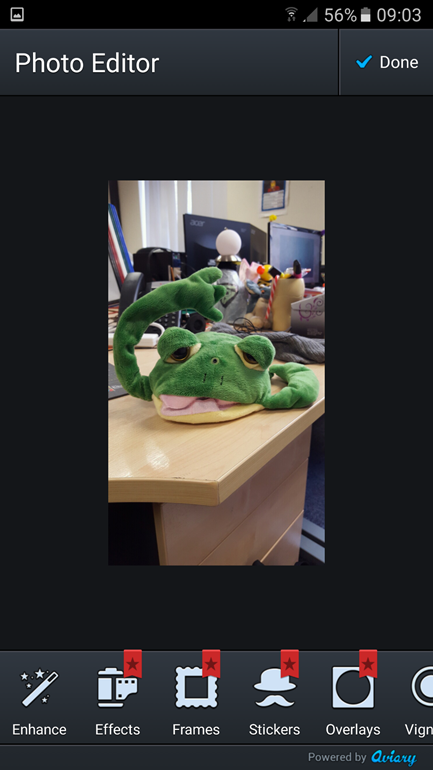
Once you have made the desired changes to the photo click the "Done" button at the top right to be taken back to the media preview window.
You are able to delete media items by clicking the dustbin icon to permanently delete this media from FrogSnap.
Once you're happy with the captured media, when viewing the preview window you are able to navigate to the upload screen by clicking the bottom central button.
Sending Media to FrogLearn Sites/Timelines
When you are viewing the uploader screen you will see the media you have taken at the top of the application in a small thumbnail preview. By default only the last media item is selected, as indicated by a green tick in the bottom right of the preview. To select more than one item to upload simply single left click more previews to turn them from grey to green.
Please Note: You are only available to upload three media items at one time.
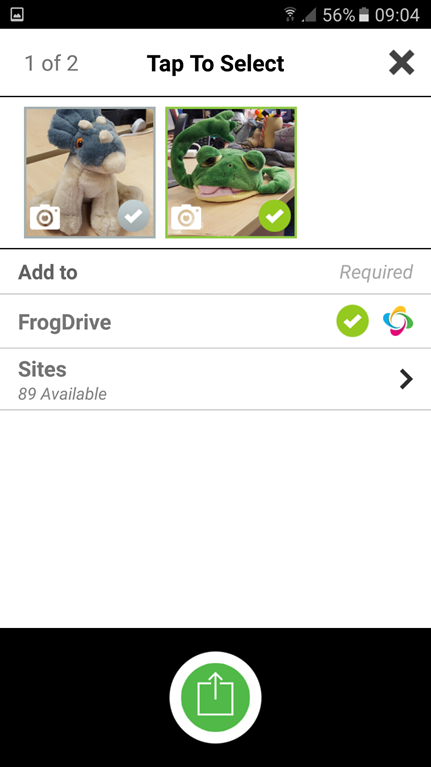
By default the area under the media previews in the "Add To" section has "FrogDrive" selected. This means if you were to hit the green bottom upload button that the selected captured media would upload to your users My Documents area in the FrogDrive application.
What you may wish to do is send this media directly to a site that contains a site timeline or photo stream widget. In order to do this click where it says "sites". The number beneath this displays the number of sites you as the logged in usert, have access to upload media to.
Please Note: Users must have Can Contribute or Can Edit & Manage permissions to a site to upload media items.
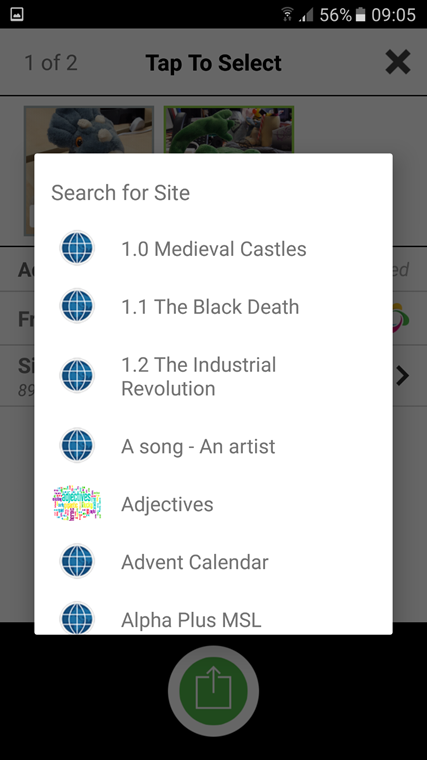
After clicking "Sites" you will be presented with a list in alphabetical order of all the sites you have access to upload media to, simply single left click a site from this list to select it.
Once a site has been selected you will have returned to the uploader window where you can add a description for the media item and keywords.
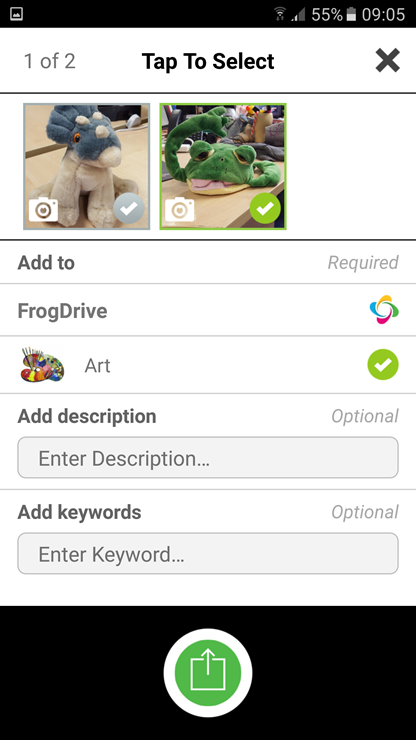
Adding a description simply means there will be a description of the media if uploaded to a site within a site timeline.
Adding tags allows you to send a media item to a particular site timeline. You may have a site with multiple site timeline widgets present so by specifying tags in a site timeline widget you are able to add the same tag as a keyword through FrogSnap to ensure media is displayed where desired.
When you are ready to upload your media, click the bottom central green upload button.
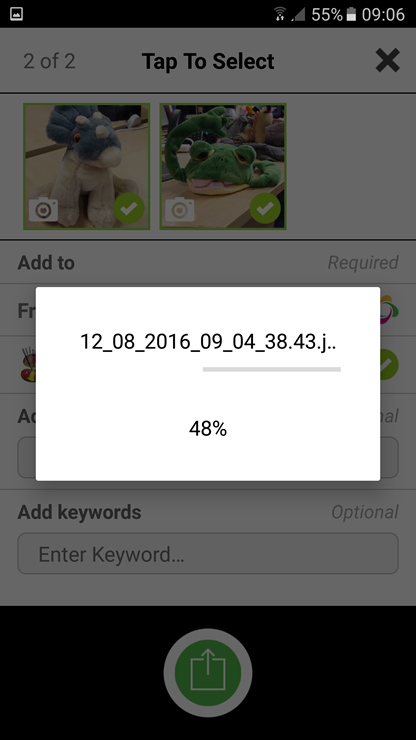
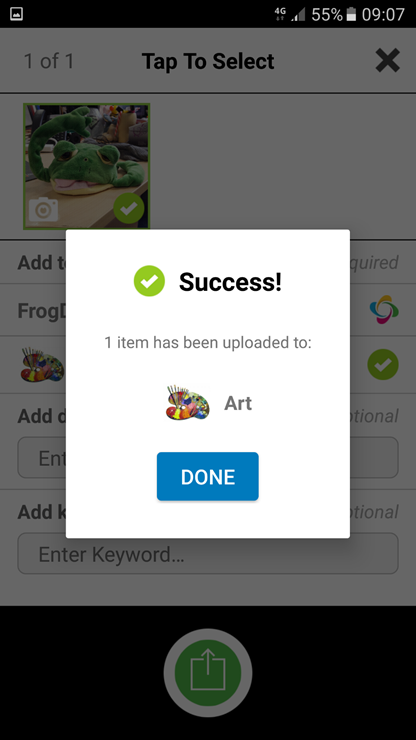
You will be shown a progress bar of the percentage of media items that have been uploaded. Once the media has finished uploading you will be presented with a screen similar to the following screenshot, indicating the upload has been succesfull.
Tutorials in this series...
product hubs